Tutorial on making the alphabet letters
Update: The alphabet is now available as a beautifully printed book. Since it contains the letters already precut, it saves a lot of time.
I noticed that the papercraft alphabet created some interest among people who are not (yet) experienced in papercrafting. Therefore, some letters turned out to be a bit too difficult for some, which prompted me to write this little tutorial. The idea is to give you pointers as to where to start.
Here is a video tutorial on the letter J:
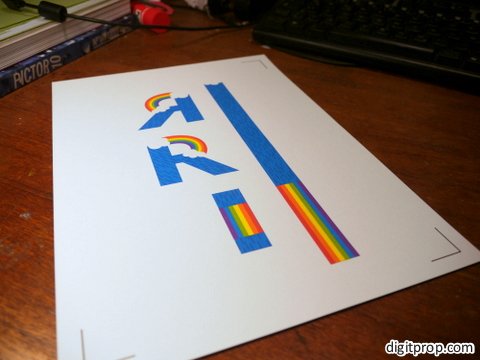
And here is a photo tutorial, I have chosen the ‘R’, as it is one of the more difficult letters due to the curved shape and the inner hole. Print the PDF template onto a sheet of paper or – preferably – cardstock. I use 190g/sqm (about 53 lb) cardstock. Please notice that the strength of the paper should match the size of the model. The letters are about 6cm (2.4 in) high, so 190g / 53 lb is already a bit on the heavy side. For larger models, the paper should be even stronger.
You can print with any printer. Using a laser printer leads to color that is less prone to smearing when getting into contact with glue or water, but inkjet printers usually have nicer colors and gradients.
Originally I said that the first step after printing is to cut out all parts. However, Carol rightfully pointed out in the comments that it might be easier to first score the pieces in the uncut template, and then cut them out. In this way, it is easier to align the scoring tool.
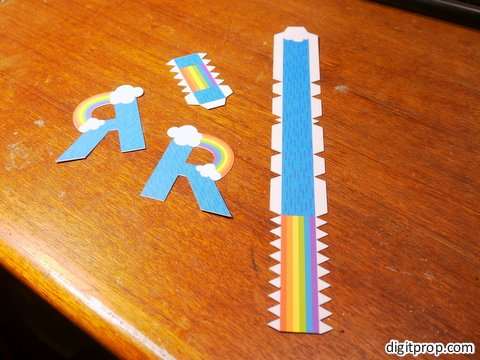
This can be done with a pair of scissors, but for details and holes it is useful to use an Xacto knife or similar sharp, pointed tool. However, please be careful with these: They are much more dangerous than scissors and shouldn’t be given to children.
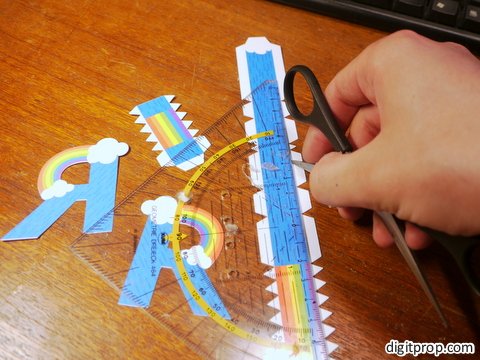
the next step is to score along the dotted lines, so that the paper doesn’t break when you fold it. This can be done with any object that is pointed but not too sharp. the tip of scissors works reasonably well. In order to score precisely, it’s a good idea to align the tool with a ruler along the straight edges (except for curved parts, of course, where you and your steady hand are on your own):
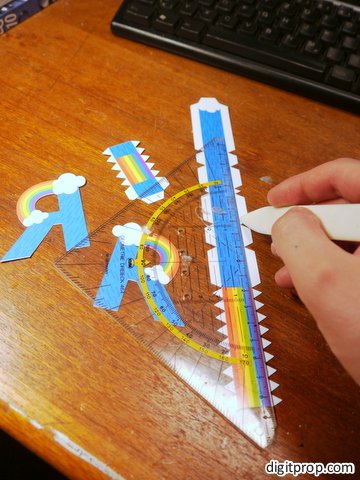
There is also a dedicated tool for this job, called a bone folder (although these days it’s made from plastics). This is not really required, but if you want to do a lot of papercrafting, it can be a good investment (and it’s really unexpensive). It can be bought in all reasonably well-assorted crafting stores.
Carol suggests to use a knitting needle, which – if you have access to one, which I don’t – might in fact be even better suited – excellent suggestion, Carol!
The next step is to fold everything along the dotted lines. There are mountain folds and valley folds. They are not specifically indicated, but it’s usually easy to determine which is which by looking at how the parts fit together.
With most letters, you have the two faces and a strip that forms the edge. The ‘R’ is no difference – except that it has two strips, one for the hole and one for the outer edge. If you look at how the edge strip aligns with the faces, it is easy to figure out which folds are mountain folds and which are valley folds.
However, even if you make a mistake and fold into the wrong direction, this can be rectified later – once the paper has been folded in one direction, it easily folds back into the other direction as well.
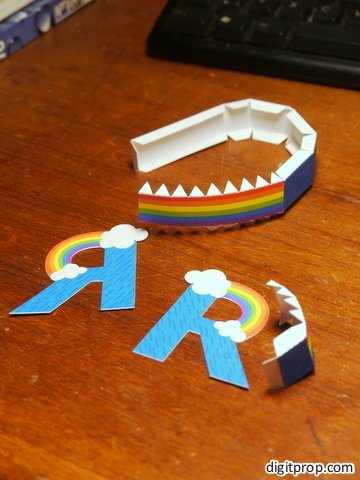
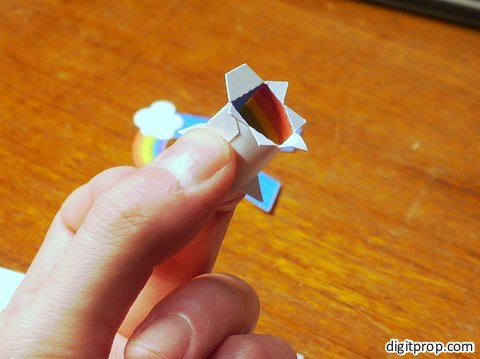
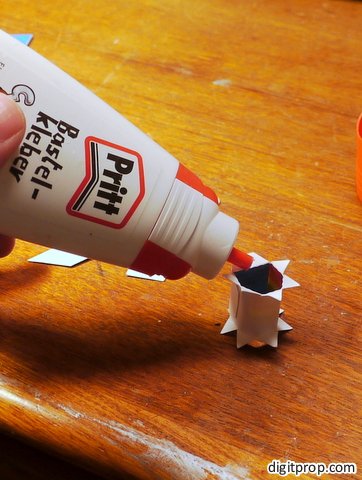
Now it’s time to glue the parts together. For the ‘R’, we start with glueing the inner edge into a circular shape. Make sure that the printed side faces inwards. Then, apply glue to the flaps on one side only:
By the way, speaking of glue: The type of glue doesn’t really matter, you can use any glue suitable for paper. I personally use white ‘crafting’ glue which dries quickly, but not too quickly to realign parts, and is not too runny. It becomes transparent when fully dried, so small smudges aren’t that tragic. However, the paper gets dirty very quickly when covered in glue, and the glue tends to solubilize the printer color (for inkjet dyes at least) – so be carefuly and keep your hands as clean as possible. Perfectionists don’t apply the glue directly out of the dispenser, but with toothpicks.
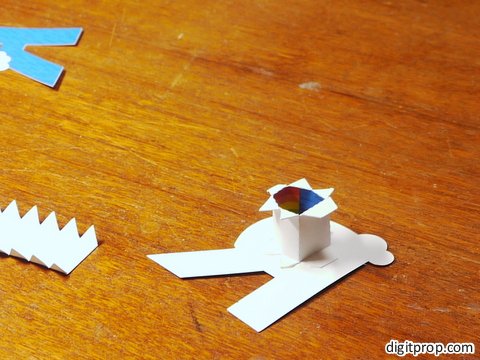
Glue the part to one of the faces, and make sure that it aligns nicely with the edge of the face:
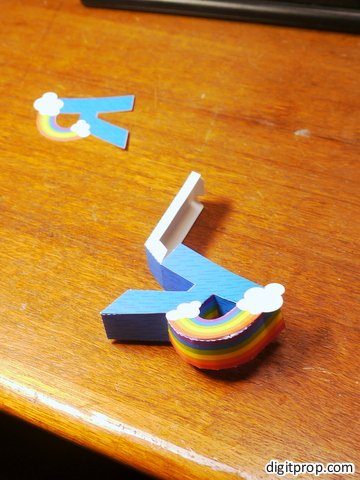
Now, apply glue to the flaps on one side of the outer strip, and section by section, glue it to the same face. You will end up with this:
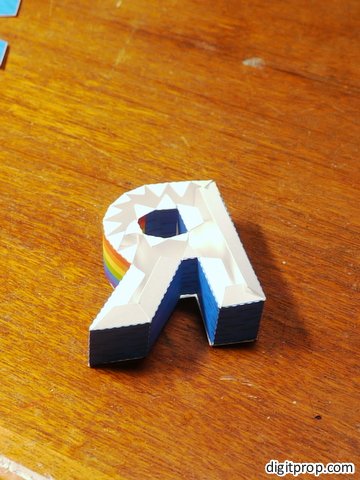
You may notice that the whole shape bends slightly, due to the uneven stress on the paper. This will be corrected by the next step: Simply apply glue to all remaining flaps, place the other face onto them and pull and push everything into shape.
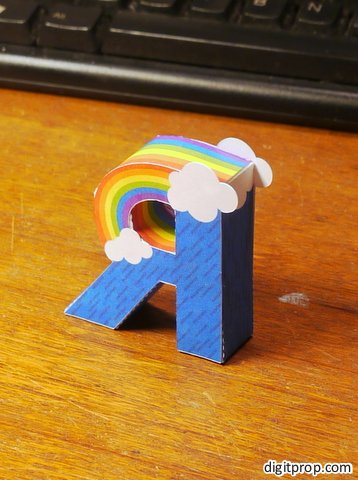
That’s it. The whole process is actually not difficult, but takes some time getting used to it. The most important ‘trick’ is to be patient: Apply glue to one section / flap at a time, hold it in place until the glue sticks, then move on to the next piece.
 This work is licensed under a Creative Commons Attribution-NonCommercial-NoDerivatives 4.0 International License. For more details on what you can and cannot do with my work, see here.

Can you make one for D
hi
I can’t do the J for joker could anybody who knows tell me how to do it
Hi Judy, I’ve made a little video tutorial for J. You can find it here. Hope it helps!
Pingback: Friday Freebie - Printable Paper Alphabet | The Junior
I don’t often comment but just wanted to say I was blown away by these, they are really beautifully done!! Can’t wait to do them with my son. Thank you SO much for sharing!!
Hey Kirsty,
thanks for the kind comment – it means a lot! Very happy you like the alphabet! And it just so happens that the alphabet has just become available in book format. See here.
Thank you for all this work!
I need to make the letters without the decorations, so could you tell me which font did you use to make them? That would help me to redesign the letters I need.
Thanks! Good job.
It’s actually not a single font, but instead I used a number of fonts as the starting point. I had to modify the geometry of most letters, in order to better fit the object they are supposed to represent. For most letters, I started with Arial. I know it’s not the most popular font among typographers, and rightfully so, but I needed a font with simple, geometric shapes.
Hi
A huge thank you for sharing your incredible talents
I am an Early years teacher and these letters are going to look amazing when I print/ make and display them in the classroom
I was wondering if i laminated them they may keep for a longer time.
Would they be harder to put together if I laminated them?
I might just try one first
Thank you so much
Sue
Hi Sue, sorry for the late reply! Was a bit busy over Easter! Anyway, about laminating: I’d think it would be rather difficult to put them together after laminating. The lamination would probably interfere with the folding. Unfortunately, there are limited options for making papercraft models more stable and robust. Some people have experimented with fibre glass and epoxy resin, but this is quite messy and results are not always good – you’d have to make sure that the resin coating is very even.
However, I have found that if you use stronger cardboard (say, 190g/sqm or heavier) the letters tend to be quite sturdy. My kids have handled the ones I made quite roughly, and they still look good. Of course they don’t survive stepping on them, but other than that they are surprisingly robust.
Thank you very much for your alphabet! My little son ( he’s 3 years old) loves these letters, his favorite are A, Z and letter J always rides on L.
My little children is 2 years old and she’s so happy painting the alfabeth and learning the letters! Many thanks!
Pingback: De vuelta al cole | lapensadera.com
I am a little confused as to why this is listed under “crafts for toddlers.” This is very complicated and there’s no way a toddler, or even a preschooler, could do all this.
Well, that’s true – this is not actually intended to be done by toddlers. I know that the alphabet gets some links from cradfting sites for young kids, but I guess that’s mostly because the final product is very much intended for kids. As for the crafting process itself, it’s certainly not suitable for toddlers, BUT I have found that small kids have great fun watching and helping when older children or adults build the alphabet. Think of it as a fun learning experience for the whole family.
Also, I have found that sometimes giving children a project that goes over their head can lead to surprisingly good results. It doesn’t have to be perfect, and more often than not I am quite surprised by their creative solutions to insurmountable problems.
THANK YOU SO MUCH FOR SHARING!!! I’m loving all of your darling designs. Thank goodness I’m retired and have lots of time on my hands.
Pingback: Объемные буквы английского алфавита | mamadelki.ru
Thanks for sharing! I made the alfabet and all the letters are fantastic. I wiil make little boxes to put them inside. When i’ll finished i’ ll send you a photo! Thank you very much!
Hi Markus! Thank you for these awesome printables and detailed instruction. I made them with my son and friends and shared it on my blog http://www.milabrera.nl/ (for english version click above right) with full credits to you. I hope that’s okay, your printables are all so awesome I just had to send everyone over to Digitprop. You might think about selling them, actually.
Hi, thanks for the nice feedback! And thanks for sharing on your blog – it’s absolutely ok, of course!
About selling… well, it’s awfully nice of you to say that the printables are fit for selling, but selling is hard, no matter the scale, and this being strictly a hobby at the moment, I’d rather focus on the creative side. The models currently on the website will always be free. Maybe in the future I will add something for sale, but it would definitely be something more complex than a simple downloadable template. I’m thinking along the line of readymade, machine-precut kits too intricate to cut them out manually. Let’s see.
Pingback: Woensdagmiddag: een 3D alfabet maken | Mila Brera
This is great platform for kids to learn and fight from their own confidence. That’s really impressive. I will surely try to come with my kids.Kids Activities in San Diego
smashing site,made my day when i found it,cant wait to get started.
Saludos a todos, imprimimos el ABC, per me ha salido muy pequeño, y es imposible armarlo.
Pingback: Open Source Paper Alphabet | Niche Envy
I love this sie. Thank you so much.
Thank you very much for your alphabet-letters! They are really fun to have in my classroom. The letters are a bit to small for the children themselves to make so I did some hours overtime… havin’fun!
I absolutely love the letters! I made a few one night and was so excited about them that I made the rest the next night! I think I’m addicted to your paper crafts now…I can’t stop making them! My only suggestion is to maybe change ‘i’ to something else to be more politically correct.
Just kidding about the ‘I’ it’s great! I’m getting all confused!
Pingback: UBERDING » Bastel dir den Regentag schön
Pingback: Alphabet en papercraft (x 26) | Paper Toy (The Papertoys Coop)
thank you so very much for the letters and the instructions
frome where i can get the templates to print out???!!
The templates can be found individually on each letter’s page, or there is a ZIP file at the bottom of the original post.
I love this alphabet!
May I suggest scoring BEFORE cutting. It keeps the smaller pieces from slipping out from under the straight edge. I use a size 0 knitting needle for scoring. Can’t get a consistently placed score with my bone folder!
Good point – I prefer scoring after cutting, since it makes moving the pieces around easier, but you are right that smaller pieces can be difficult. I will add your suggestion to the blog post. Thank you for the feedback!!
Thanks for upload the alphabet file, I’ve downloaded it for playing with my 16-months-kid
hope she enjoy it :)
Pingback: Literele din alfabet devin realitate cu hârtie colorată | UrbanKid.ro
I love the paper alphabet! Perfect for my classroom!
I printed and created the letters A, L, E, X, and I to spell my name! I got impatient and used tape instead of glue, and my printer was funky so my astronaut and elephant are more purple than gray, but they were all really fun to make! My favorite is L is for Lion. I will definitely be making more!
Loved your creations! What fun to make these cute letters!!! So far I have tried letters I and A. I was wondering if there is a way to print them in a larger size than the given template?? I want to hang these in my baby’s room however, the current size would be too small for this purpose. Would appreciate any response, Thanks.
Thanks for the feedback! As for printing in a larger size: If you have a printer for larger paper formats, then it’s straightforward: In the print dialog of Adobe Reader, you can select a scaling factor, such as 200%. Scaling up with a regular A4 / US letter printer will be difficult, though. In general, you could print the templates across two (or more) pages and glue the parts together where they stretch across page boundaries, but this is a bit finnicky and may lead to less than optimal results.
Another alternative would be to take the PDFs to a print shop and ask them to print on larger paper. In that case, I strongly suggest to use a heavier paper weight (50 – 80 lb), otherwise the finished letters will not be stable enough.
Thanks you Marcus for the tutorial:)
I knew I wasn’t going about it in the best possible way, but I’m still proud of the handful of letters I put together. My paper was too lightweight, I got sticky fingers and I’m not very patient! Still, your designs are wonderful and I’m putting together a post on my site showing what I made. I’ll post in comments under alphabet when I have my piece up.
This tutorial will be VERY helpful for anyone who wants to put together any of your creations.
Great tute , you have made for us.
Thank you, but for me it was allready clear how to make them.
I’m still impressed of your designs, you are really talented and artistic.
Hope to see soon more;-D
Happy crafting days.XD