Rotating image valentine card
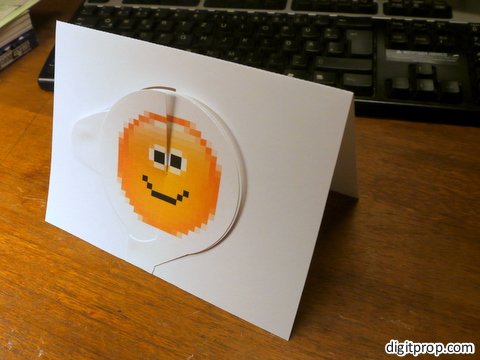
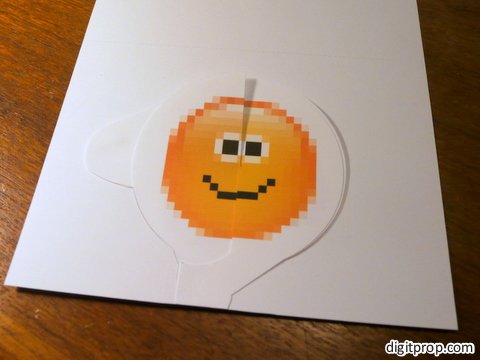
This is a valentine card with a special trick – when you rotate the image, it changes. I found this very cool idea and concept on the Extreme Cards and Papercrafting blog, and more specifically on this page – a very nice blog with a wealth of unusual, eye-catching and beautiful papercraft projects. Here is what it is:
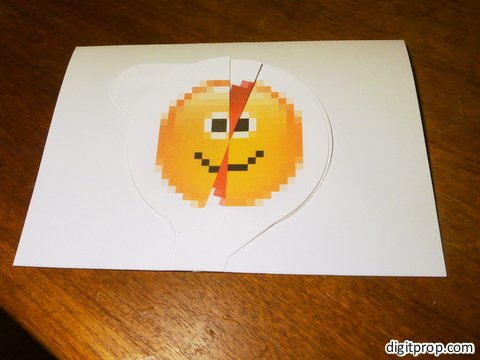
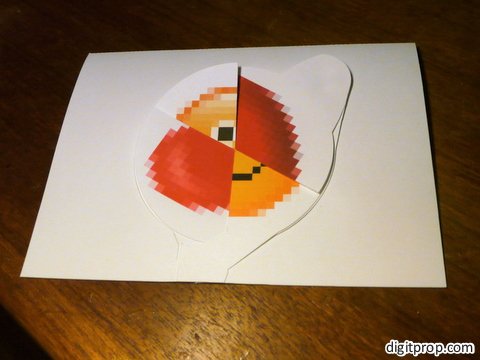
Looks like a regular greeting card, right? Now, when you pull the left-hand handle and rotate the image, this is what happens:
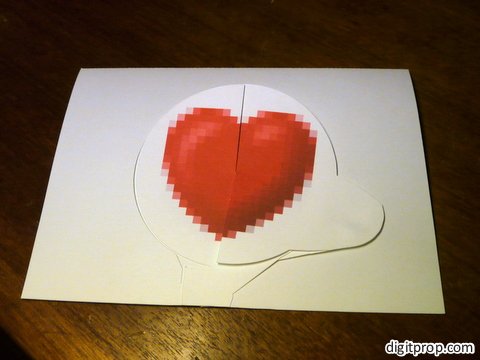
The smiley is replaced by a heart. Add some personal text and you have the nicest valentine card. Here is a video that shows the effect:
Should anybody wonder, the pixelation is deliberate – I like the old-school 8-bit look of the smiley and heart icon.
Now, how do you make one of these? Well, first of all, print and cut out the following two-page template:
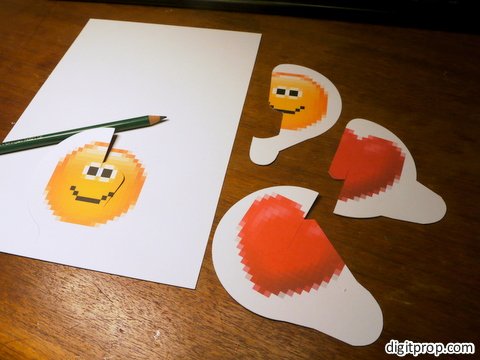
You will get three smaller pieces and the card itself:
(The pencil is supposed to highlight the fact that the card itself also has an internal cut. This will be difficult to make with scissors, and I rather suggest a Xacto knife or similar tool)
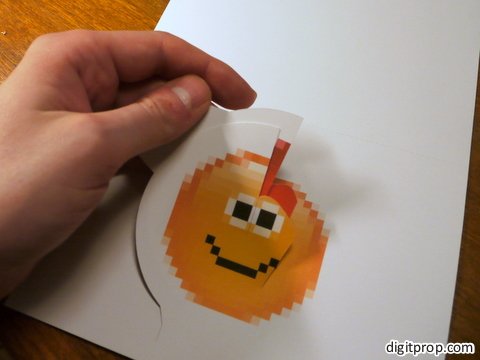
Now, you have to align one of the ‘heart’ pieces with the card itself, like so:
The heart piece goes behind the smiley part, and they should be aligned so that the vertical cut ends for both at the same position. This also means their left semicircle edge will align:
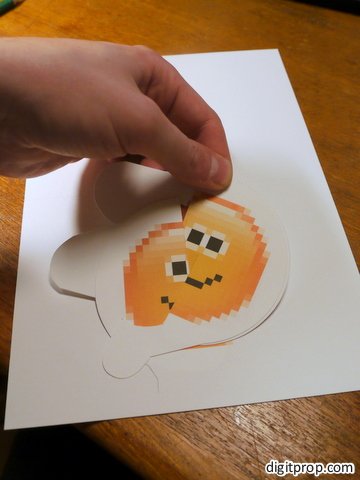
Next, take the other two parts and align them in a similar way to each other:
Next, keep each of the two pairs firmly together and slight one pair into the other, so that they interlock and meet at the vertical incision:
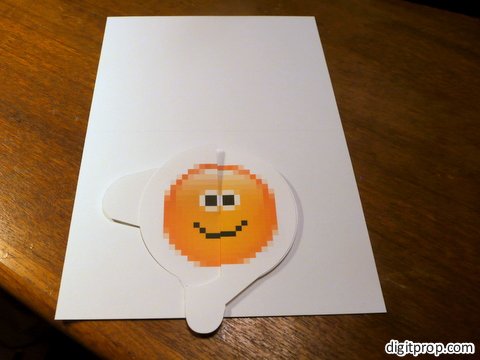
This is a bit difficult, and you have to be sure that everything is perfectly aligned. In the end, the two top parts should form a complete smiley face:
Almost done. Now glue the bottom flap to the card. As you can see, it extends below the card, but that will be corrected by cutting the piece off where it sticks out. Glue the two left-hand flaps together, but not to the card. Make sure that the parts can rotate freely while the glue is drying. The pieces interlock and hold each other securely in place. The glue makes sure that the two rotating parts move in sync, and that they cannot move too far – otherwise, they would fall out of the card.
Here is the card after trimming the bottom flap:
All that’s left to do is to fold the card at the center line and to come up with some witty / romantic / cool text to go inside the card.
Again, kudos to Extreme Cards and Papercrafting for the idea and concept.
 This work is licensed under a Creative Commons Attribution-NonCommercial-NoDerivatives 4.0 International License. For more details on what you can and cannot do with my work, see here.



i’m more and more impressed, i live in the Netherlands and for my birthday i have had bought a working paper thing with a sound to make yourself.
i couldn’t make it.LOL
A specially not the the last part. ugh.
so i always thing when i looking to somebody that can make and draw them wooow.
so thank you and your aweseome and very smart and as well brilliant.:-D
Pingback: Ideas para San Valentín
Just would like to say a huge thanks for the inspiration, and for sharing where you got the idea. It really helped me make my own for the kids material I’m doing. Just finished photographing it for the site and I really love it.
Thanks for the comment – I just had a look at your site, and it looks great!
I’m gonna make this today for my gf. Plus I’m gonna add some drawings to this…
It’s a brilliant paperwork! Wish I came up with something original as this, but this helps too :)