Chameleon
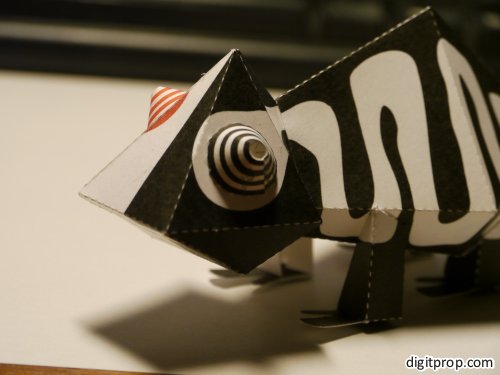
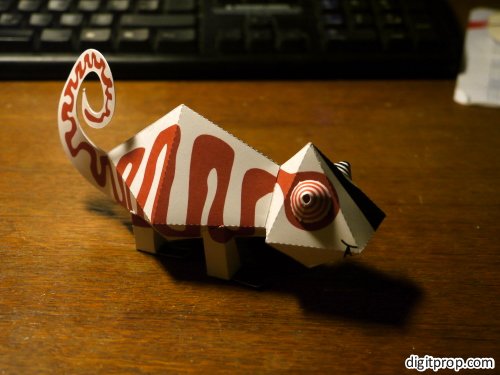
Don’t ask me how it came to pass, but I decided to make a papercraft chameleon. After some tweaking of the color scheme, I settled for a classical B/W and red combination.
The daughter dismissed it as a toy, lacking the cuddly factor. So I had to reluctantly move it over to the decorative department.
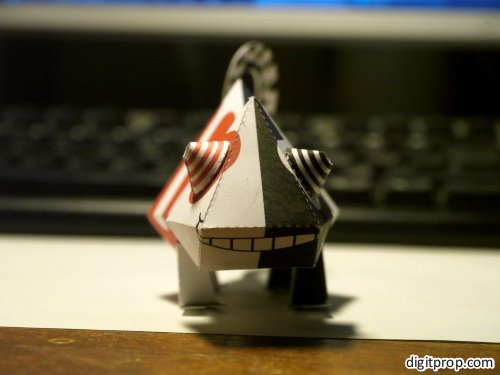
In the photo, it’s somewhat subtle, but the chameleon is grinning. Sort of a Cheshire Cameleon (hey, that sounds snappy – maybe I should trademark this). I still don’t know if the smile is a good idea, but for some reason I always felt that chameleons have something mischievous about them – maybe their sneaky color changing ability.
Speaking of color changing, I am quite unsure what the best option is here. After playing around with very bright, colorful combinations, I accidentally hit the black color and liked it. Still, I’m open for suggestions.
Building instructions
Building the chameleon is not that difficult. It consists essentially of two parts – the body and the head. Admittedly, the head looks somewhat confusing at first glance, but it’s not that hard to figure out where everything goes.
Start with the body, part a. First, glue the two tail parts b and c to a. Next, glue flap 6 to the opposing side. This will form a six-sided interface to the head. Keep the other flaps of part a open yet, so that it’s easier to attach the head.
Now turn to part d, the head. Glue flaps 7-11 to their opposing sides. This will form the head, with a six-sided opening that will attach to the body. The flaps of the head go into the body – that’s why you should keep the other flaps of the body unglued until the head is attached. Now, glue the head to the body.
Next, close the body by gluing all flaps 2-6 to their counter parts. Glue the two parts of the tail back-to-back.
Almost done. On to the eyes. These are simple: Carefully put them into a round shape – wrapping them around a pencil works fine. Then glue them into a cone, leaving a small hole for the ‘pupil’. Then attach them to the head, centered over the red and white spot respectively.
The final step is assembling and attaching the legs. These are pretty self-explanatory, except maybe for the first part: Fold the feet onto the adjacent square and glue them in place there. This will bring the printed side up. Then, fold the other two flaps onto the feet, fixating the shape of the legs. Then, attach the legs to the body. Use the pattern to see where exactly the legs go. Parts e and f are the hind legs, g and h are the forelegs.
Here is the template (see also instructions here):
It’s just the PDF for now (sorry, am somewhat short on time right now), but if you’d like to have an SVG, or CDR file or if you need a template for the CraftRobo, please let me know in the comments or via the contact form.
 This work is licensed under a Creative Commons Attribution-NonCommercial-NoDerivatives 4.0 International License. For more details on what you can and cannot do with my work, see here.


Well, i did it ! This chameleon is very cute ! Really love it ! Thanx a lot ! You can see mine here : https://twitter.com/Gaz0line/status/504361404544327680 . Now this chameleon is sitting in a french living room ;)
Very cool – thanks for sharing yours! Looks like he enjoys living in France (and I can’t blame him, France IS great)…
Thanks a lot ! I was looking for a nice papertoy to represent myself with my curriculum vitae for a nice job (about art&craft for kids), then it’s done !
I draw a instruction booklet, if you art interested in, i can sent it.
Pingback: Chameleon de Digitprop | Papertoys, Papercraft & Paper Arts
Pingback: Chameleon | Paper Gifts for Estefany
I’m in LOVE! Never thought of chameleons being mischievous but the Cheshire smile suits.
Can P be for ‘pottamus? :)
Awesommmmmmmmmmmmmmmmmmmmmmme!
Yay thanks for the model :D
Love the grinning chameleon.
But stupid me didn’t read the instructions.
I glued every part of the head and the body so I had problem attached the head to the body if you know what I mean…
Then I had a hard time too figured where I should attached the legs. LOL
Guess next time I should read the instructions first :p
I’m going to make some more. This is awesome.
Pingback: Camaleón bicolor | Diseños en Papel para Descargar Gratis, compartir e imprimir. Descargables Cool, Chic y Vintage para Niños y Mayores.
Thank you, great [project)! My grandson will love it.
I love it!! easy to fold and do :) perfect gift to my frineds :)
I’m lost. I can’t seem to find the instructions to construct my own chameleon army… I’ve printed out the PDF Template already, and the “Instructions here” link doesn’t seem to take me anywhere helpful.
Sorry, those are rather general instructions for all paper models on this site. They are not specific to the chameleon. I haven’t gotten around to making specific instructions for the chameleon, but will try to do so tonight. I will post an update soon, so please stay tuned.
Ok, done. Sorry it took another day. I have added building instructions (see above), and I have labeled the parts and flaps for easy reference in the instructions. Hope that helps – if you encounter problems, please let me know.
fantastic, ended up making 4 of these for around the office…we now have a Chameleon army!
Wow, a whole army! When I think about it, no office should be without one, just in case! I wouldn’t actually mind seeing pictures, if you happen to have some…
wasn’t able to open instructions – message was too many redirects
You are right – sorry about this glitch! I have fixed it. And thanks for the notice – it’s appreciated!
Pingback: Chameleon paper toy from Digitprop · Indie Crafts | CraftGossip.com
Pingback: RBW Chameleon Paper Toy | Anime Kensei
Pingback: RBW Chameleon Paper Toy | Entertainment Blogs