Tag Archives: instructions

Tutorial on making the alphabet letters

2012-08-04

Update: The alphabet is now available as a beautifully printed book. Since it contains the letters already precut, it saves a lot of time.

I noticed that the papercraft alphabet created some interest among people who are not (yet) experienced in papercrafting. Therefore, some letters turned out to be a bit too difficult for some, which prompted me to write this little tutorial. The idea is to give you pointers as to where to start.

Here is a video tutorial on the letter J:

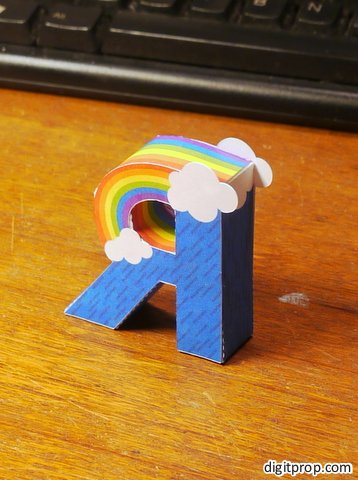
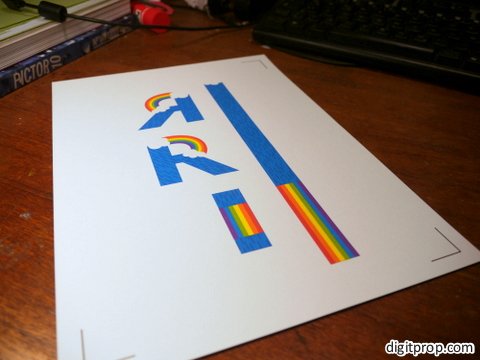
And here is a photo tutorial, I have chosen the ‘R’, as it is one of the more difficult letters due to the curved shape and the inner hole. Print the PDF template onto a sheet of paper or – preferably – cardstock. I use 190g/sqm (about 53 lb) cardstock. Please notice that the strength of the paper should match the size of the model. The letters are about 6cm (2.4 in) high, so 190g / 53 lb is already a bit on the heavy side. For larger models, the paper should be even stronger.

You can print with any printer. Using a laser printer leads to color that is less prone to smearing when getting into contact with glue or water, but inkjet printers usually have nicer colors and gradients.

Originally I said that the first step after printing is to cut out all parts. However, Carol rightfully pointed out in the comments that it might be easier to first score the pieces in the uncut template, and then cut them out. In this way, it is easier to align the scoring tool.

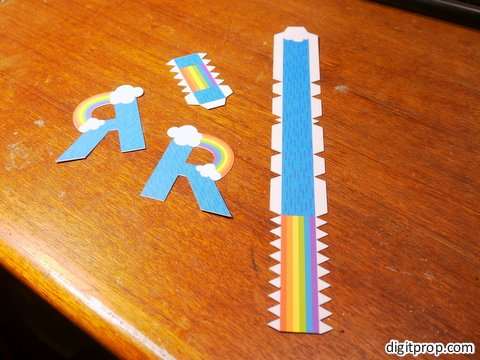
This can be done with a pair of scissors, but for details and holes it is useful to use an Xacto knife or similar sharp, pointed tool. However, please be careful with these: They are much more dangerous than scissors and shouldn’t be given to children.

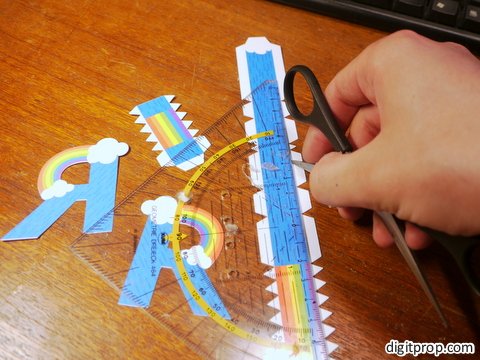
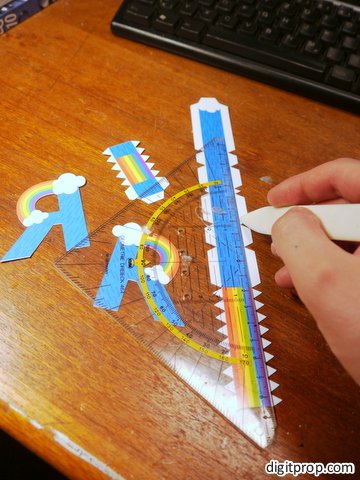
the next step is to score along the dotted lines, so that the paper doesn’t break when you fold it. This can be done with any object that is pointed but not too sharp. the tip of scissors works reasonably well. In order to score precisely, it’s a good idea to align the tool with a ruler along the straight edges (except for curved parts, of course, where you and your steady hand are on your own):

There is also a dedicated tool for this job, called a bone folder (although these days it’s made from plastics). This is not really required, but if you want to do a lot of papercrafting, it can be a good investment (and it’s really unexpensive). It can be bought in all reasonably well-assorted crafting stores.

Carol suggests to use a knitting needle, which – if you have access to one, which I don’t – might in fact be even better suited – excellent suggestion, Carol!

The next step is to fold everything along the dotted lines. There are mountain folds and valley folds. They are not specifically indicated, but it’s usually easy to determine which is which by looking at how the parts fit together.

With most letters, you have the two faces and a strip that forms the edge. The ‘R’ is no difference – except that it has two strips, one for the hole and one for the outer edge. If you look at how the edge strip aligns with the faces, it is easy to figure out which folds are mountain folds and which are valley folds.

However, even if you make a mistake and fold into the wrong direction, this can be rectified later – once the paper has been folded in one direction, it easily folds back into the other direction as well.

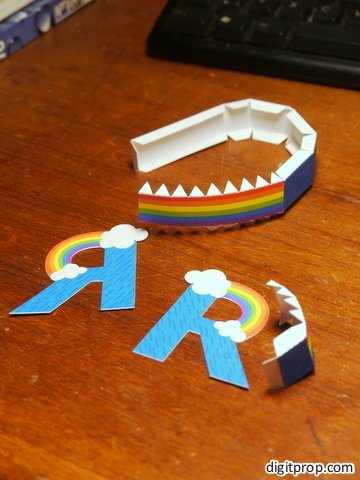
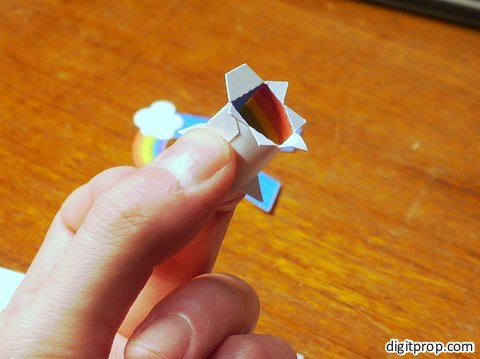
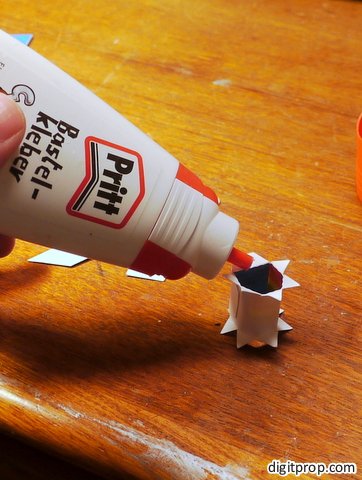
Now it’s time to glue the parts together. For the ‘R’, we start with glueing the inner edge into a circular shape. Make sure that the printed side faces inwards. Then, apply glue to the flaps on one side only:

By the way, speaking of glue: The type of glue doesn’t really matter, you can use any glue suitable for paper. I personally use white ‘crafting’ glue which dries quickly, but not too quickly to realign parts, and is not too runny. It becomes transparent when fully dried, so small smudges aren’t that tragic. However, the paper gets dirty very quickly when covered in glue, and the glue tends to solubilize the printer color (for inkjet dyes at least) – so be carefuly and keep your hands as clean as possible. Perfectionists don’t apply the glue directly out of the dispenser, but with toothpicks.


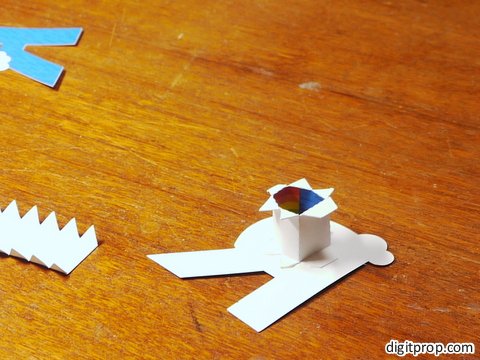
Glue the part to one of the faces, and make sure that it aligns nicely with the edge of the face:


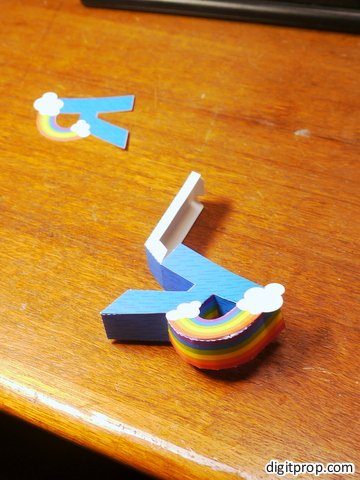
Now, apply glue to the flaps on one side of the outer strip, and section by section, glue it to the same face. You will end up with this:


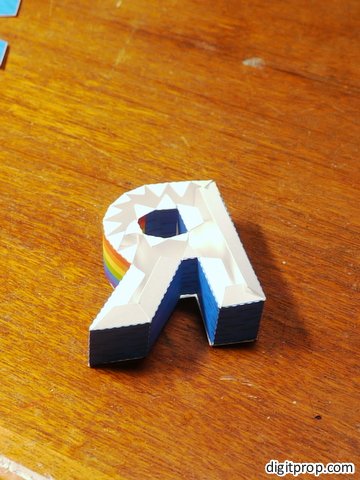
You may notice that the whole shape bends slightly, due to the uneven stress on the paper. This will be corrected by the next step: Simply apply glue to all remaining flaps, place the other face onto them and pull and push everything into shape.

That’s it. The whole process is actually not difficult, but takes some time getting used to it. The most important ‘trick’ is to be patient: Apply glue to one section / flap at a time, hold it in place until the glue sticks, then move on to the next piece.
Determining the length of a curve in Corel Draw 11

2012-06-21

When designing in Corel Draw, it can be very useful to know the total length of a curve. Since the curve may consist of straight and curved sections, this is not trivial, and unfortunately the user interface doesn’t help you here – it only tells you the width and height of an object.

So in order to get that length, use this Visual Basic macro:

Sub getLineLen()
 Dim sel As Shape
 Set sel = Application.ActiveDocument.ActiveShape
 Dim l, sl As Double
 Dim seg As Segment
 Dim prevu As cdrUnit

 prevu = Application.ActiveDocument.Unit
 Application.ActiveDocument.Unit = cdrMillimeter

 For Each seg In sel.Curve.Segments
 sl = seg.Length
 l = l + sl
 Next seg
 MsgBox ("Length: " & l)

 Application.ActiveDocument.Unit = prevu
End Sub

This should work in other versions of Corel Draw, too, but I could verify that for version 11 only. In order to make this work, go to the menu item “Tools -> Visual Basic -> Visual Basic editor…”. Click on “GlobalMacros”, then on “Module” and “CorelMacros”. Paste the code at the bottom of this text file. Then click on File -> Save.

To use the macro, select the relevant curve, then click on “Tools -> Visual Basic -> Execute…”. Select the macro from the list (select “Macros in” “all standard projects”) and click on “Execute”. The length of the curve will appear in a small message box.

Lego Group’s fair play

2011-02-23

Among other things, this site contains templates that can be used in conjunction with Lego® toys. The Lego Group is rightfully protective of their trademarks, and for anyone providing stuff related to Lego® bricks, it’s a good idea to follow their fair play rules. I usually despise all documents in legalese and am very easily annoyed by overzealous corporations, but in this case I have to say that the Lego Group did a good job in making their point clear, helping fans to play along, and to keep things very reasonable.

Since I require it for all posts related to Lego® bricks, I will here copy their suggested disclaimer:

“LEGO® is a trademark of the LEGO Group of companies which does not sponsor, authorize or endorse this site”

Printing and cutting the templates of this site

2011-02-20

This site features several models which can be printed and cut. You have three options:

  1. Print a model, then cut it manually
  2. Print a model, then cut it using Craft Robo
  3. Import the artwork and cutting outline into a software for whatever cutting plotter you use, and proceed as required.

Option 1 is self-explanatory, for option 3 you are on your own, and for option 2 I do have further instructions here:

The templates come in two parts. Download the PDF and the GSD file. The PDF contains the artwork, the GSD contains the cutting instruction for the Craft Robo.

Print out the PDF onto a 190g crafting paper. Load the paper into the Craft Robo, then load the GSD into Robo Master and start cutting.

Using the SVG files

SVG is a universal file format understood by many vector graphics applications. One of the most popular open-source vector editors is Inkscape. In addition to the actual artwork, the SVG file contains green and magenta lines. Green lines are supposed to be cut, magenta lines are folds (which should be cut as a dashed line, preferably using an alternating pattern of 1.2mm cut and 1.2mm non-cut).

Using the Corel Draw files

The Corel Draw files are actually the easiest to use. They contain everything you need in order to print and cut a model. Just print the page after loading a file, then cut it using the Corel Draw macros that came with the Craft Robo software (the menu item “Cut/Plot Craft Robo” under the button “Launch application” in the tool bar (the icon looks like the Corel logo with a dropdown arrow).

The “Cut/Plot” dialog will open. Make sure you check “use registration marks”. Also, select “By layer”, then uncheck the “Art” layer. Check the “Fold” and “Cut” layers. Check “Enable driver options”, uncheck “single setting for all”. Select the appropriate paper for both layers (Index 90lbs works for me, using 190g paper). For the “Fold” layer, select line type “Custom 1”, for the “Cut” layer line type 1.

Edit line type “Custom 1”, and enter “0.120 cm” for ‘a’, “0.120 cm” for ‘b’. This will produce dashed lines for the folds. Depending on your paper type and thickness, you may want to set the “Cut” layer to two or more passes instead of just one.

Converting CorelDraw to GSD files

2011-02-19

Craft Robo’s aptly named control software Robo Master uses a proprietary file format ‘GSD’. I work with CorelDraw, and while CDR is perfect for cutting directly (and in my opinion much better suited for complex Craft Robo projects than Robo Master), there is no way around the GSD format if you want to pass on designs to other people.

The way I do the conversion is as follows:

First, I split the art to be printed and the cutting outlines. The art to be printed goes into a PDF file, and the cutting outlines into a GSD. The reason behind this is that complex artwork does not convert correctly to GSD – only very simple shapes do.

Now, in order for this to work we need to make sure that the registration marks are included in the PDF and that they align with the registration marks used by Robo Master.

I have prepared a Corel Draw file with registration marks at the exact same positions as the default positions in Robo Master.

Using this file, these are the steps I follow:

  1. Position the artwork and cutting outlines inside the registration marks
  2. Move the cutting outlines to an invisible layer or delete them temporarily
  3. Export the document as a PDF
  4. Make the cutting outlines visible again or restore them. Delete everything else (make sure that the cutting outlines are ungrouped and are all in a single layer. This should be the only layer in the document)
  5. Due to a bizarre behaviour of Robo Master, where imported DXF files have their center at the lower left corner of the page, we need to add an offset to the outlines. Go to ‘Arrange-> Transformation -> Position’, and enter 148.5 and 105 mm (half the page size for an A4 page). I have prepared a macro included in the template mentioned above you can use for that: Go to “Tools -> Visual Basic -> Play” and select RecordedMacros.dxfoffset
  6. Now go to “File -> Save as…”, select as file type ‘DXF – AutoCAD’
  7. In the AutoCAD export window, select “AutoCAD R13” as the export version, and select “Millimeters” as the export unit.
  8. Open Robo Master, go to “File -> Load DXF…”
  9. Save the file as a GSD file.

Paper weight and measurements

2011-02-17

Ok, so this is one more thing where the shadow world government has failed miserably: Paper weight (technically, grammage) and dimension units, or – even worse – paper size standards. There is the big divide between continental Europe and the British empire, including its overseas colonies, but then there is also a whole mess of local customs, regional deviations, and odd preferences.

It seems nobody can agree on what size paper should come in, and how to measure its dimensions. Luckily, here is a convenient table for everything, and here is the Wikipedia article on the same topic.

Most projects described on this website will be based on190g-300g DIN A4 paper, which corresponds to 53 -82 lb bond/ledger and 8.27″ x 11.69″.  Using US letter format should be fine, but you should slightly scale the templates to fit on the page before printing. If you are unsure about the grammage, just use sturdy carton which is still flexible and thin enough to be easily cut and folded.

If you use a Craft Robo, you have probably already found the thickest paper you can still cut through, and that should work fine for the projects on this site. If you are unsure about what the Craft Robo can digest, I suggest that you do some quick experiments. Note that there is a huge difference between a sharp new blade and a blade that has cut through a couple of dozen sheets already, so try to use a fresh blade.