Monthly Archives: May 2011

From Blender to Pepakura to Corel Draw to CraftRobo

2011-05-08

Blender is an excellent open-source 3D modelling application. Pepakura Designer (short: Pepakura) is a very useful tool for papercrafting, which converts 3D models to 2D templates which can be printed on paper, cut and assembled into the original 3D model.

The two are a great combination for papercrafting. In fact, I found the combination of Blender for 3D modelling, Pepakura for unfolding, Corel Draw for postprocessing, adding artwork and finetuning, and finally CraftRobo for cutting perfect. Here is the complete workflow:

First, you need to export the Blender model to the 3D Studio format understood by Pepakura.

Go to

File > Export > 3D Studio

then save the file. Then, simply open the file in Pepakura. Once you have created a satisfactory 2D pattern, the next step is to get it into Corel Draw. There are several vector export formats available in Pepakura, however all of them have some problems. I found the best one to be DXF (AutoDesk’s ‘Drawing Interchange Format’).

In Corel Draw, click on

File > Import

then select ‘DXF AutoCAD’ as file type and select the file exported from Pepakura. You will then be able to place the file into your existing page, by pressing LMB and dragging the mouse until the shape has the correct size.

Note that the DXF format separates the shapes for folding and cutting into different layers, which are preserved in Corel Draw. This is very convenient when you want to process them differently (such as assigning them to different cutting types for the Craft Robo).

One important drawback of the DXF format is that Pepakura chops up the outline of a shape into individual edges. This can be difficult to work with in postprocessing. Therefore, another option is to use the EPS format. Here, you need to carefully c0lor all cutting edges in the same color in Pepakura. This will create a contiguous outline in the EPS file. Unfortunately, the EPS file does not preserver the color information itself, so all edges – folding and cutting – are black, and you have to separate them manually.

You can now add artwork and edit the shapes, if necessary. Once that is done, you can simply send the file off to the Craft Robo for cutting. I keep the folds and cuts in different layers (see above) and assign the following cutting parameters:

Folds: Index 90lbs paper, 10cm/s, force 30, line type: Custom 1 (0.120 cm a, 0.120 cm b), Passes: 1

Cuts: Index 90lbs paper, 10cm/s, force 30, line type: 1, Passes: 2
Converting AVCHD files to MPEG-2, MPEG-4, AVI or WMV

It so happens that my Panasonic GH-1 is capable of spitting out so-called AVCHD files (with the extension .MTS). AVCHD is supposedly superior to older video encoding formats, but a lot of old software (such as Adobe Premiere Elements 3) cannot process it.

Being a strong proponent of not touching a working system, and seeing that Premiere Elements 3 still works quite well for me (except for, ahem, AVCHD import), I looked for inexpensive ways to convert such files to MPEG-2. And, lo and behold, I was successful:

There is a freeware that does the trick quite neatly, the aptly called Free-HD-Converter. Now, be careful: This piece of software is indeed free, but during installation it tries to install rather spammy looking browser toolbars. I unchecked these options (one cunningly starts with ‘accept terms and conditions’ … of the toolbar, that is).

If you avoid these toolbars, everything else seems rather fine. The user interface is very straightforward, there are several options with regard to the output format, and that’s about it. Conversion is taking some time, on my (admittedly rather old) system, the conversion frame rate is about 3 fps, which means that one minute of video takes about 10 minutes to convert.

Infrared photos

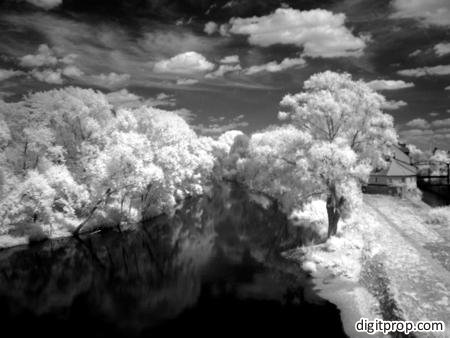
I noticed that there are still some hits for the infrared photos I had up on the site a long time ago. Those were taken with a Canon G2 – still a nice camera, although it feels like a toy these days, now that I am used to the Panasonic GH-1. And I guess there is equipment out there, compared to which the GH-1 feels even more like a toy.

Anyway, I digress. Here are the photos – I have uploaded them to Flickr:

For an IR filter, I have used an ORWO 585. This is a lowpass filter which passes light below 790nm. It’s not completely opaque above that threshold, but you have to look at a very bright light source to see a faint violet spot through it, so for all practical purposes it works well.

As you may know, the Canon G2 – like almost all other digital cameras – has a built-in IR filter. This is because the CCD sensor is very sensitive to IR light, and would otherwise produce images which are quite different from the usually intended standard film look.

Fortunately the G2 filter is not completely opaque for IR light, so it works in general, but you have to accept long exposure times and off-the-balance autofocus. This means working with a tripod and manual focus in as bright daylight as you can get. Don’t even think about doing this on an overcast day.