
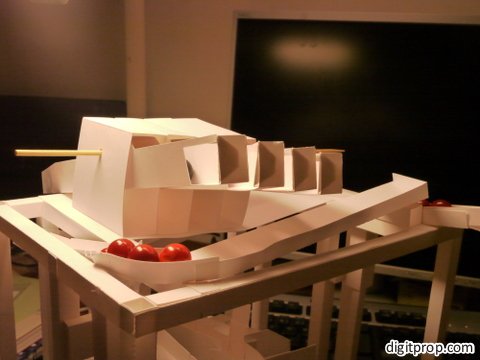
This is definitely one of the nerdier projects I have pursued. A multiplication machine made from paper, powered by marbles running through the machine.
Here is it in action:

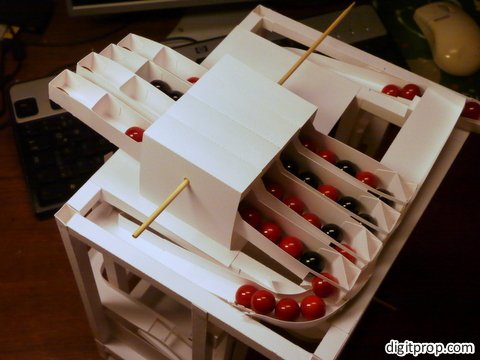
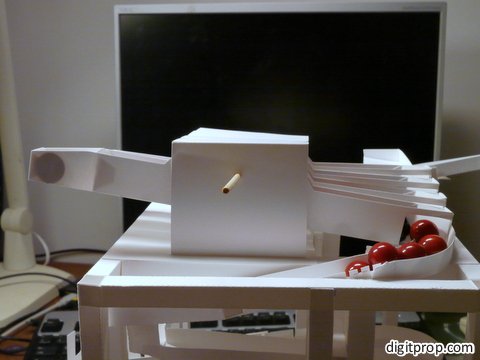
You can build one yourself, if are so inclined – you will find the template at the end of this post. Here it performs a 4×3 multiplication:

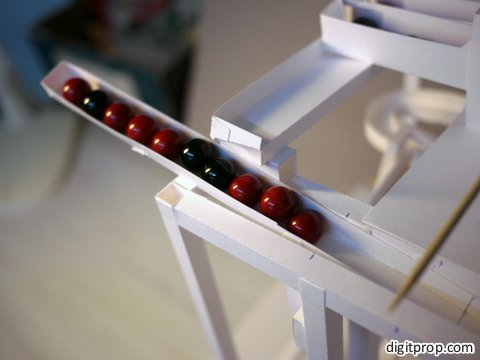
This is where you set the first factor, by adding the corresponding number of marbles:
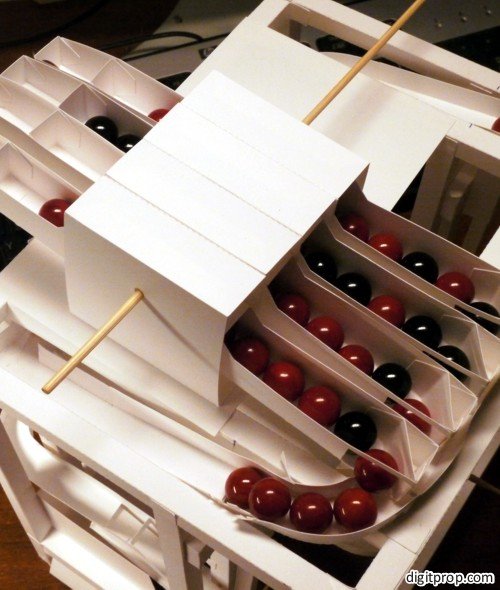
This is the reservoir, from which the marbles are moved to the output:

And this is the core of the machine, the ‘adding unit’. By pulling out or pushing in the tabs, you can set the second factor:

Admittedly, this project got a little bit out of hand. The idea is simple: Set the two factors of a multiplication, then let marbles run from a reservoir to the output until the result is reached. Making such a machine work, however, was surprisingly difficult. It took me several iterations and many fine-tunings to get to a paper-based machine that is robust enough to work reliably.
Before I go into the details on how to build the machine, here is a more detailed explanation of how it works and what happens during the multiplication:

Why a multiplication machine, you ask? Well, admittedly in an age where we are surrounded on all sides by computing power, there are easier ways to multiply. Especially in the range of 1 to 10, which we are talking about here. However, the machine turns multiplication into a physical process which is easy to observe. It essentially demonstrates how multiplication is a series of additions, thus making multiplication much more tangible for very young students.
And, being a physical machine, it can teach a lot about mechanics and (paper) engineering. Here are some interesting questions kids may ponder when using the machine:
- What’s the trick? How does the multiplication work?
- What are the limits of the machine? How small or large can the two factors be? Does 1 work? Does zero work?
- What if something goes wrong? A marble gets stuck? There are not enough marbles in the reservoir? How does this affect the result?
- Are there other uses for the machine? How could it be modified to work differently?
Now, how to build this beast? Well, first of all, this is not for the faint of heart. You will need about 20-40 hours, depending on your skill set. If you have a cutting plotter, things will be significantly easier, but it’s of course possible to do it with scissors and an x-acto knife. Also, as opposed to papercraft that has a purely aesthetic value, you will need to build this one very precisely, and likely several parts will require several build-test-refine cycles. If that doesn’t deter you, here is what you have to do:
Before you start, please note that the template is for marbles with a diameter of 14mm. If you don’t have these (and you will need as many as the highest product you want to calculate with the machine), I suggest that you scale the templates up or down to adjust to the size of the marbles you want to use. I don’t recomment deviating too much from 14mm though, as a widely different scale may break the mechanics, or at least need some adjustments.
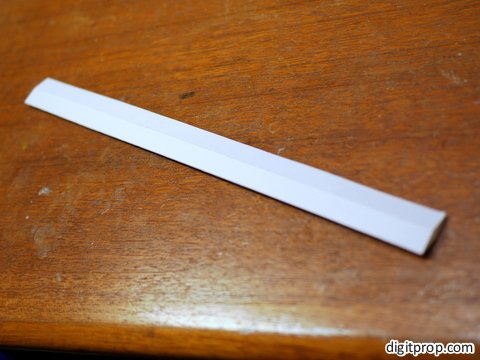
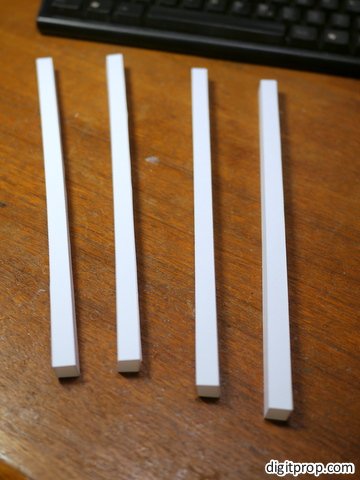
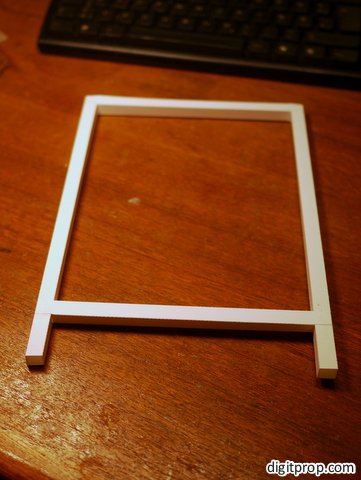
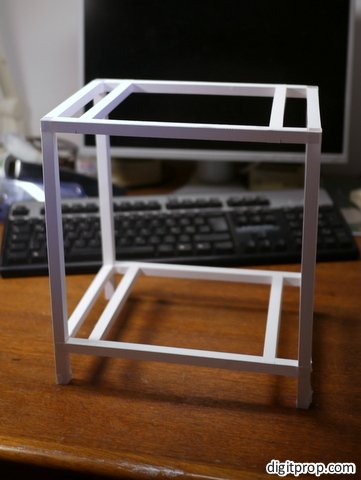
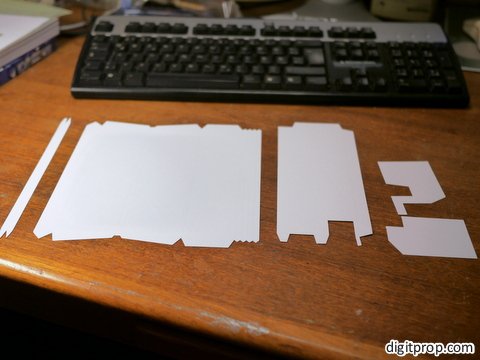
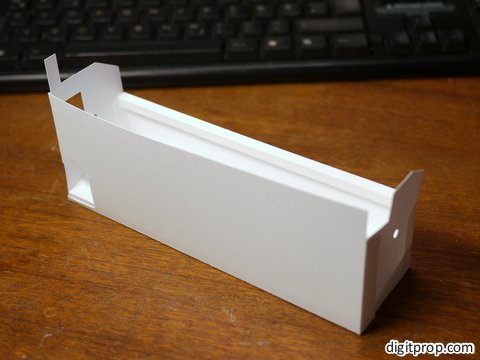
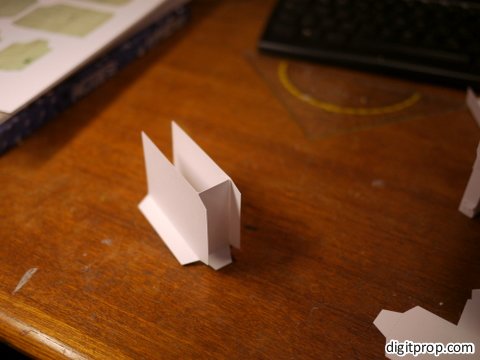
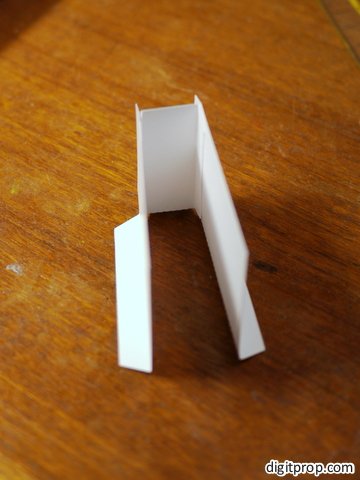
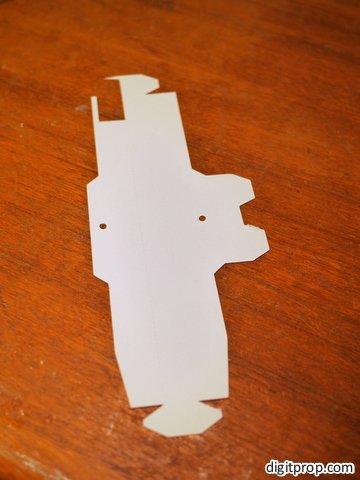
First, print and cut out the 22 pages of the template, to be downloaded below. I used 190 gsm paper (about 53 lb “bond” ledger). Then, start with the frame (pages 1 to 8). The frame consists mostly of straight square beams. Each beam has five sides, four for the outside and one that serves as a glueing tab:

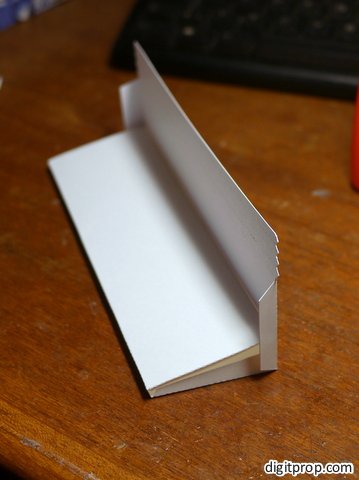
It’s easiest to fold all four sides, then flatten the whole thing and glue it together. Afterwards, you can bring it back to its intended square shape:
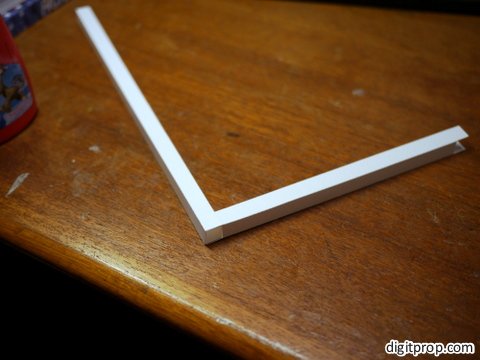
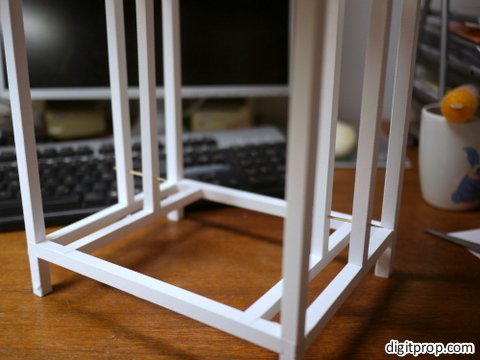
Now it’s time to create two squares: Use two each of the ‘vertical corner struts’ and the horizontal ‘back and front struts’:
This is how the corners connect:
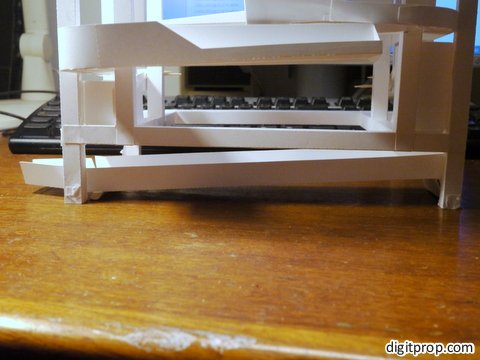
Now take the four ‘horizontal side struts’ and create the cube:
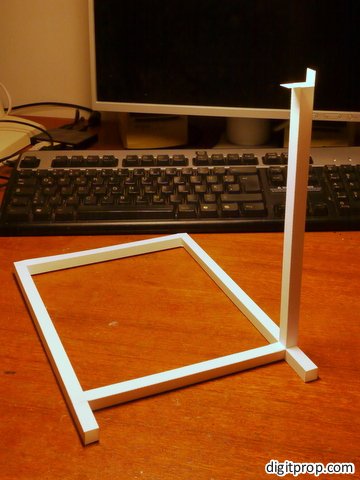
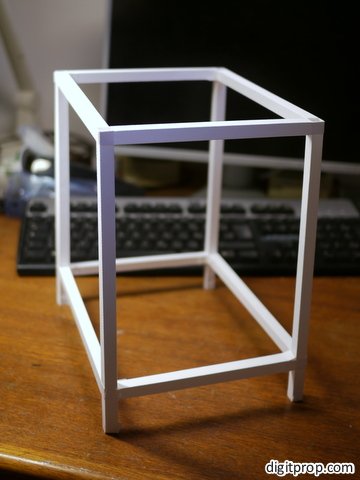
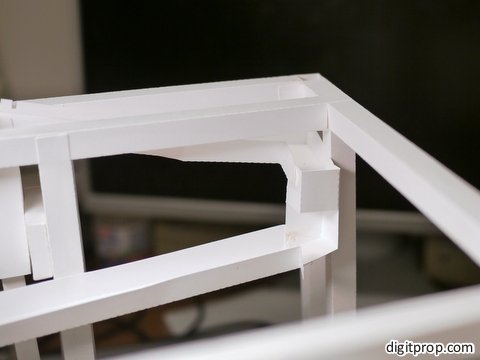
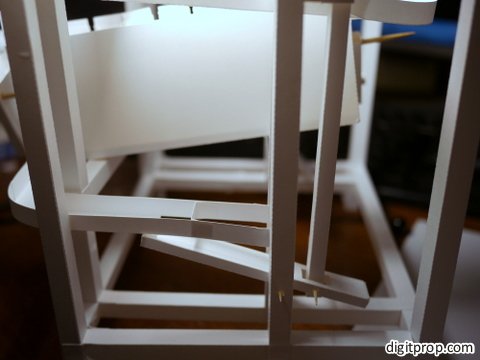
Ok, this is the frame which will carry the internals of the machine. Next, we need to add four more horizontal struts:

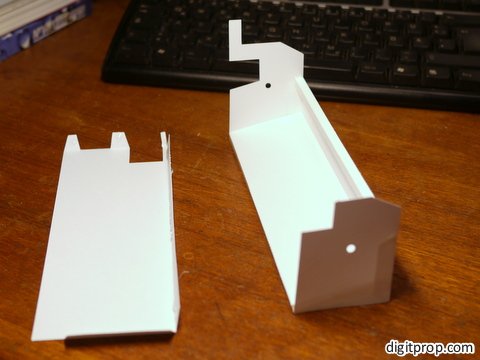
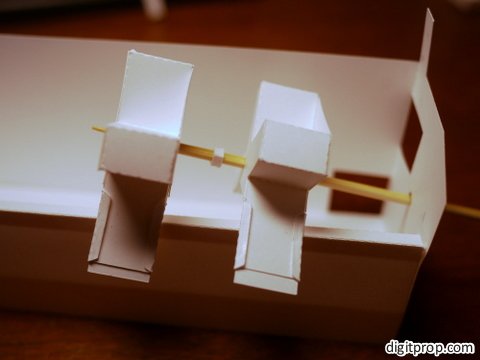
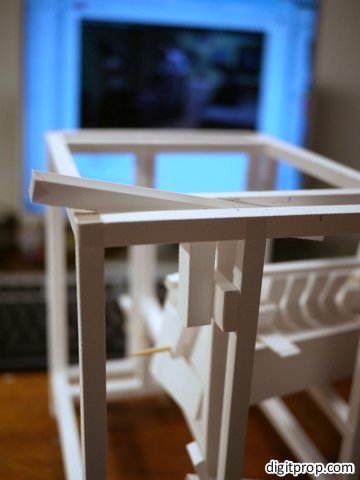
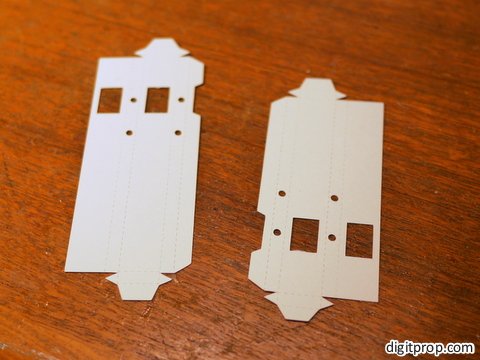
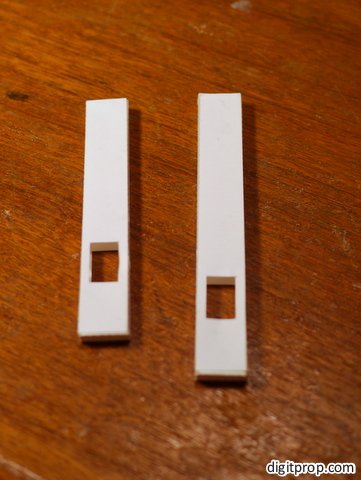
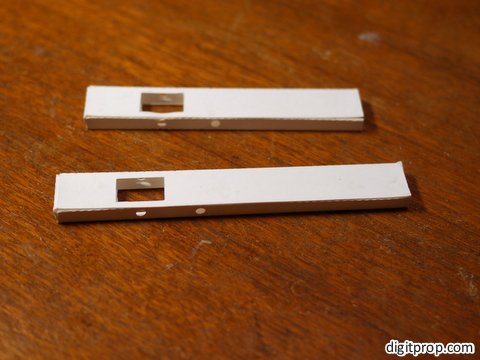
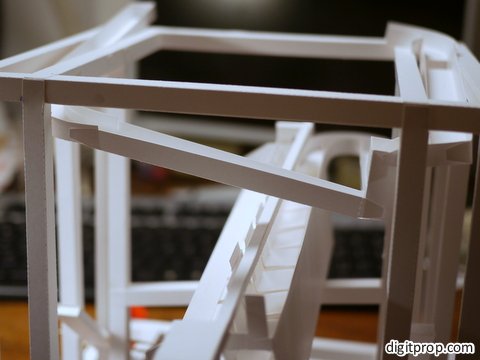
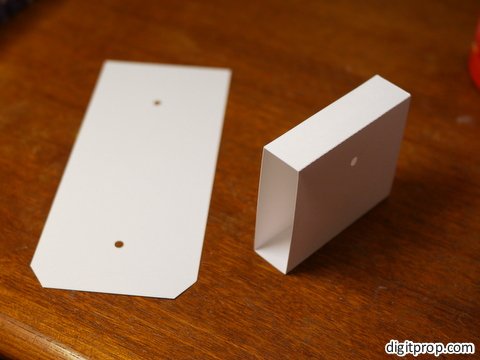
Now it’s time for four vertical struts, labeled ‘back center strut with hole for escapement’ and ‘front center strut with hole for escapement’. This is the first element that will connect to a moving part. In order to do so, the struts need holes in order to hold a toothpick that will later serve as an axle. Regular toothpicks are about 2mm in diameter. The holes, therefore, should be about 3mm in diameter. It is very important that the toothpick can rotate freely and with as little friction as possible.
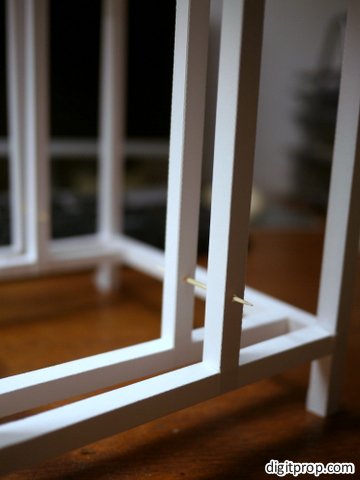
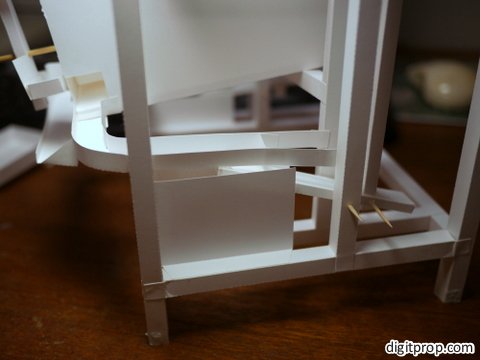
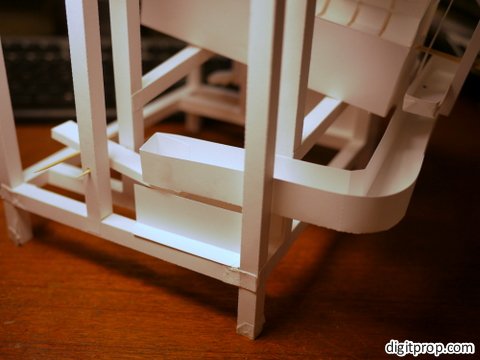
Here you can see where the struts go:
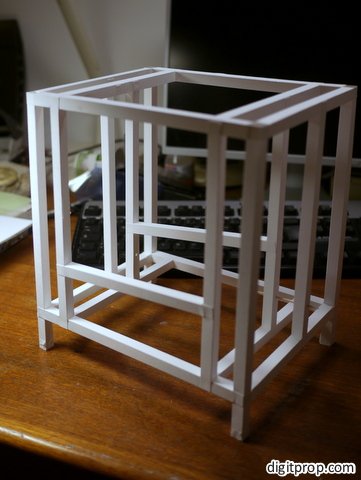
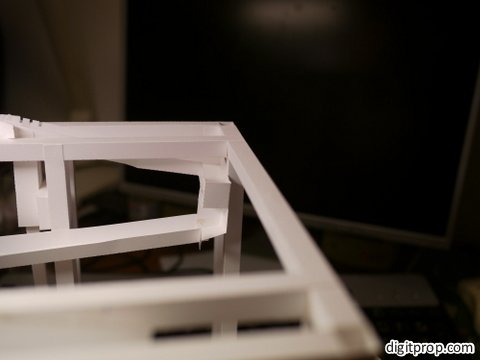
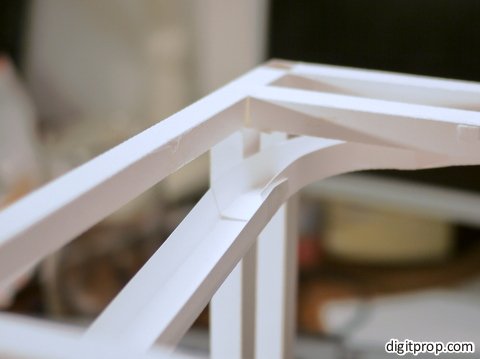
Ok, finally two more horizontal struts which will later carry the adding unit. The adding unit must be mounted at a slope, so that the marbles can easily run downwards across it. Therefore, the struts are to be added at different heights:
Alright, that wasn’t so difficult now, was it? Well, the next part admittedly will be a tad more difficult. The good news, though, is that it won’t get more complex than this. We need to build the adding unit. This is what we are aiming for:
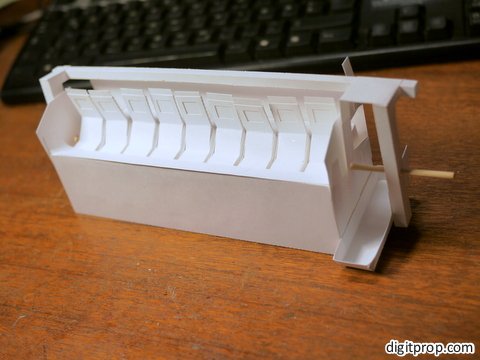
Before building it, I recommend watching this video which explains how it works:

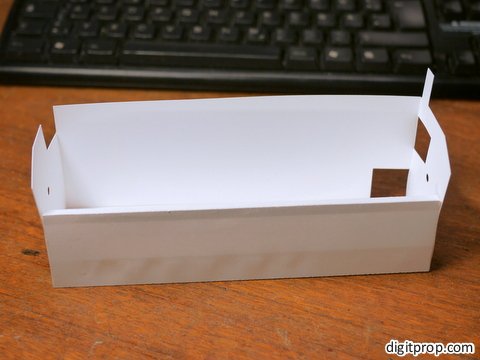
This is a highly mechanical part with ten moving elements. It is very important that it is built as precisely as possible. Start with the frame:
Fold the large floor part back on itself, to create a slope. Then add the sides. Note that they, too, contain holes. However, this time we will not put a toothpick through the holes, but a larger skewer. The skewers I found are 3mm in diameter, so the holes are 4mm wide:
Now add the back:
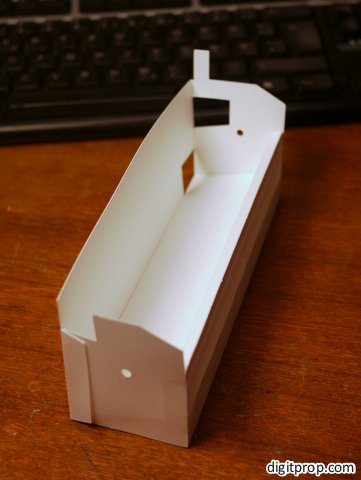
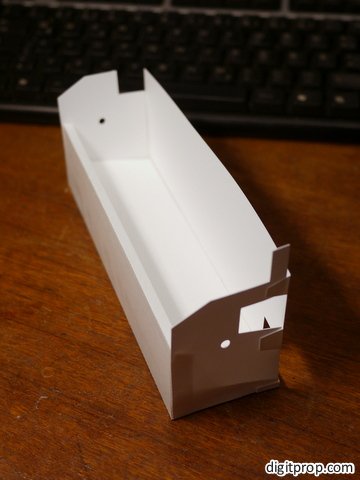
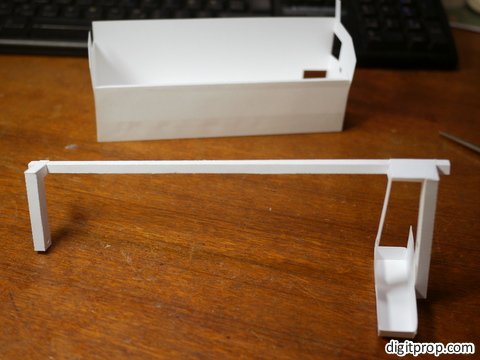
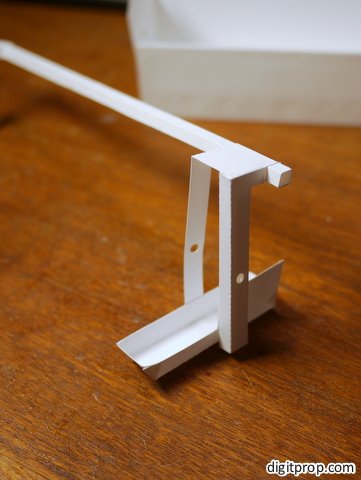
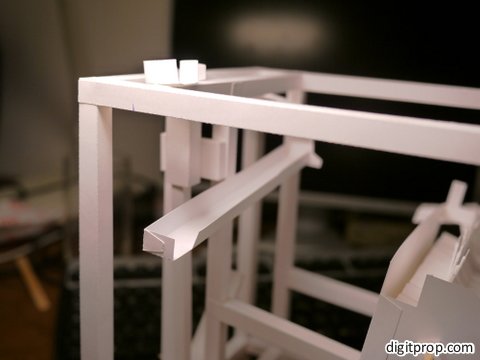
The next step is a lever bar which will reset the adding unit after a full cycle (more about this later). The bar runs across the whole adding unit and is held in place by a wooden skewer. At the right side, it has a basket which will catch the marbles coming out of the adding unit. This is what it looks like:

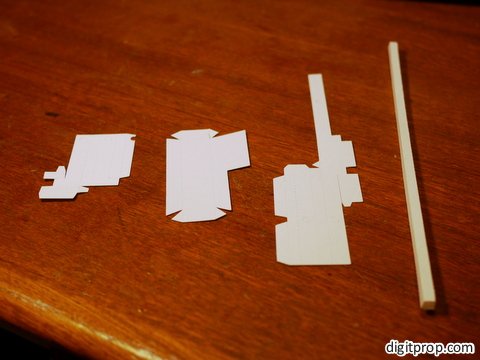
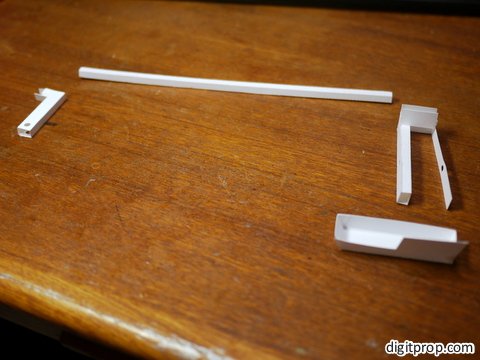
Here are the parts:

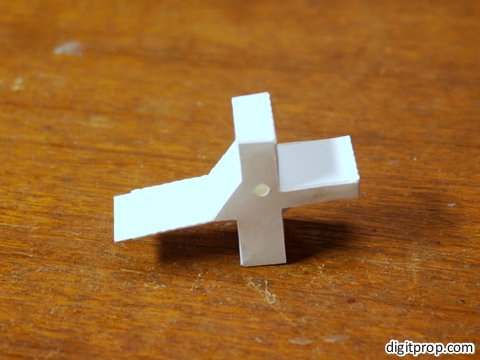
Now we need to build nine so-called ‘rockers’. These are bistable elements that can be in an ‘up’ or ‘down’ position. As you will see later, the rockers are doing the counting during the multiplication – they keep track of how many marbles have passed the adding unit.
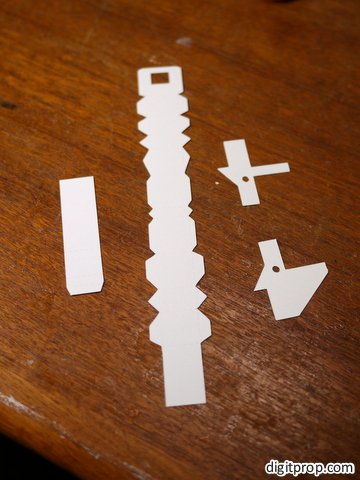
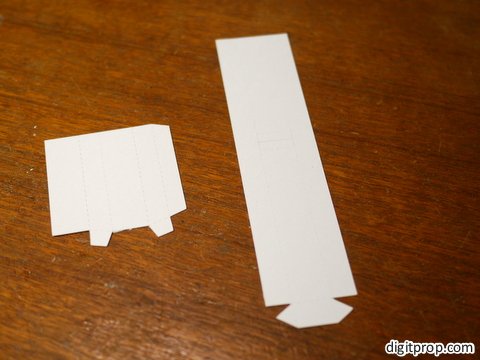
These are the parts. The two small ones are the two sides of the rocker. Each contains a 4mm hole. The large one holds the two sides together. And the leftmost part will be a tab inside the rocker which can be pulled out or pushed in – more about that later.
Fold and glue the large part to one side. Pay attention to which side goes where – the rocker is asymmetrical. Also, there are two flat pieces that come together. Don’t glue them to each other.
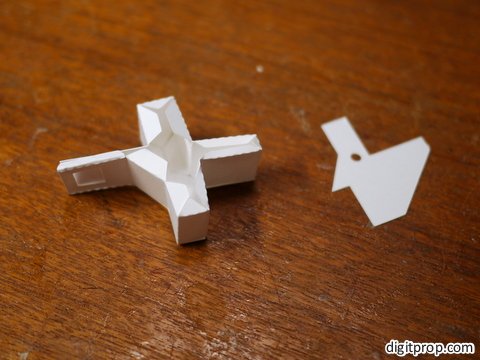
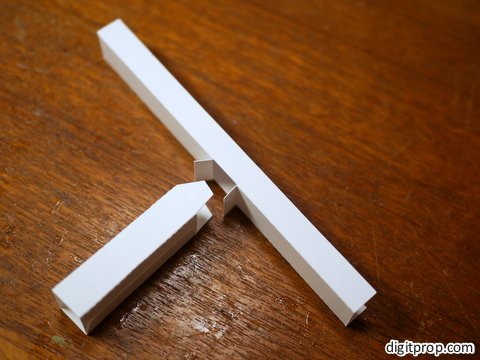
Now, build the tab. It should look like a distorted ‘T’:
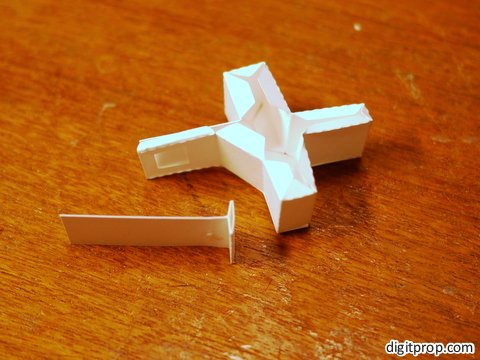
Put it inside the rocker, so that it can slide between the two flat pieces:
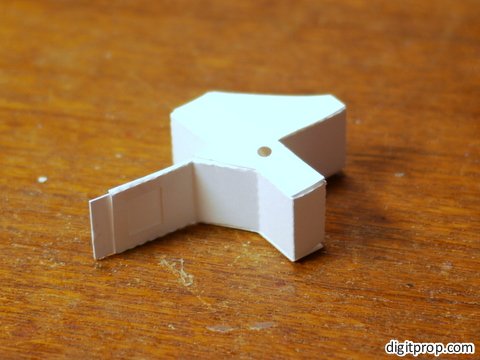
Once the tab is in place, you can glue the other side to the rocker and finish it:
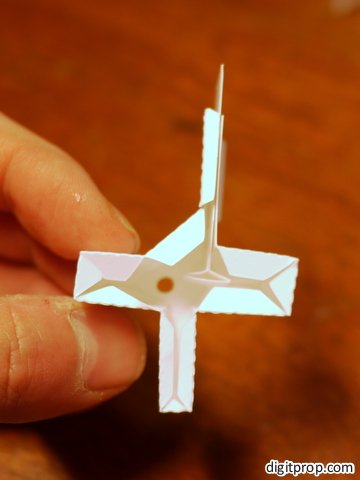
As you can see, the rocker has an additional ‘wall’ on one side, to stop the incoming marbles. Also, there are small flaps at the side of one of the two flat pieces that hold the tab in place. Glue them together, so that the tab cannot fall out:

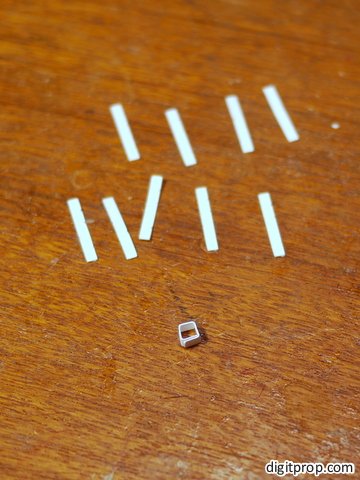
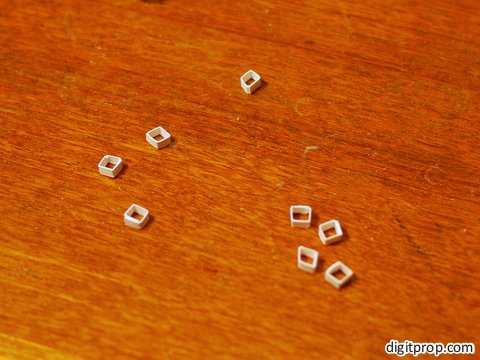
Good. Next we need spacers. Those are small, 1.6mm wide, strips of paper that are to form small circles or squares. I found it easiest to score them at four equidistant positions and fold them into squares. The diameter must be large enough to allow the spacers to go onto the skewer without friction.
Time to assemble the adding unit:
Thread the skewer through the right side of the frame, then add a spacer, then a rocker, again a spacer, and so on.
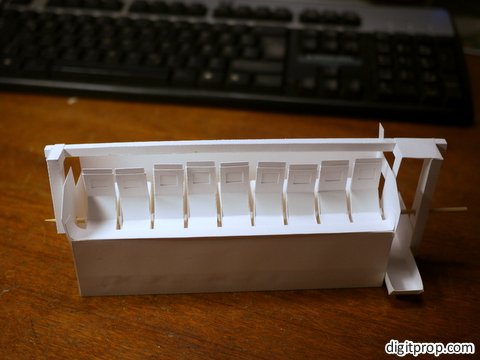
The unit should finally contain nine rockers, each separated by a spacer from the next. Note that there should also be a spacer before the first and after the last rocker. Now add the lever bar by threading it onto the skewer.
Congratulations – the most difficult part is over. Now on to the two so-called ‘escapements’. The idea behind them is that they release one marble at a time, each release being triggered by another marble passing below. There are two of them, each feeding into the adding unit from different sides.
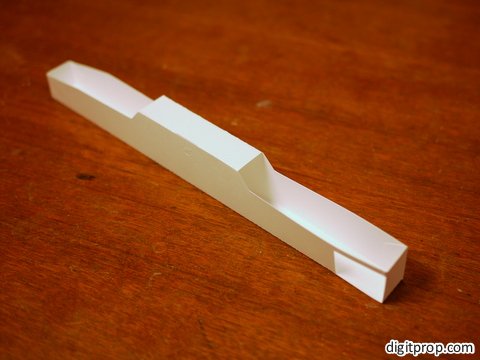
They consist of a conduit with a hole in the middle, and a shaft that fits into the hole:
The straight escapement goes to the front of the machine, and the curved one to the back:
Note the square spacer that connects the shaft of the escapement to the vertical struts and holds it securely in place.
Next, build balances that form the bottom part of the escapement. These contain 3mm holes as well as square holes. For the latter, you will need a sharp xacto or similar crafting knife:
The escapement balances are attached to the frame using toothpicks, like so:

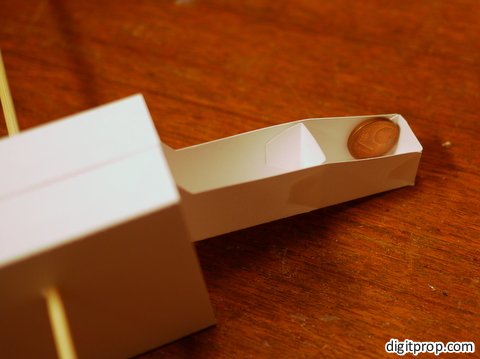
The second toothpick holds a piston in place that goes through the shaft at the top. In this way, a marble resting in the hole over the piston will be released from the escapement when another marble falls onto the balance:

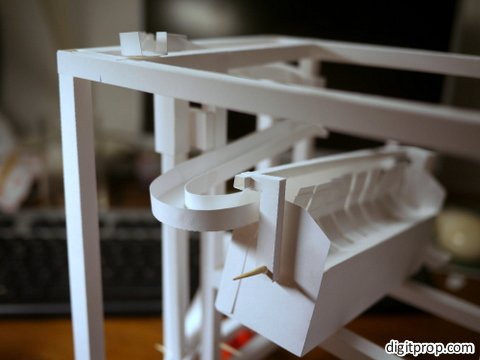
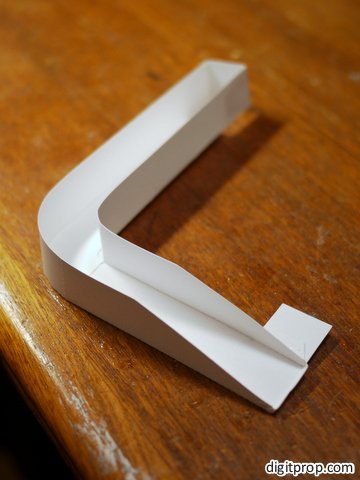
Ok, we now have to do some plumbing, connecting the various parts. The pieces you will need are found on template pages 16-18. Start with a straight piece connecting to the curved escapement in the back, then to a short chute. The chute connects to another straight conduit leading to the left side:

A 180°C turn connects the conduit to the left side of the adding unit, which can be placed on the skewed horizontal struts:
The front escapement connects to a 90°C curve and then a straight conduit leading to the chute:
Now we need to connect the output side of the adding unit to the escapements. There are two outputs: One is at the back of the unit, the other is the basket. The one for the basket goes to the front and looks like this:
You will find the parts on page 17. The other one is for the back and can be found on page 18. It looks like this:

Glue them in place like so:

Next, we need to set up walls around the escapements, so that incoming marbles don’t go stray.

This is how they should look:
Now we are almost there. In fact, you can already start testing the machine (if you haven’t done so already anyway). In order to complete it, you need to add more capacity for stored marbles at the top, the so-called reservoir. Frankly, this gave me some headache, because it’s not easy to store several dozen of marbles and release them in a controlled way. Their weight is enough to make the escapement slip and release more than one marble at a time. In order to mitigate the weight, I have constructed four balances that each hold about a dozen marbles. It looks like this:

And here is a video on how it operates:

The first balance blocks the others. Only when it is emptied, it will tilt and the marbles from the next one will become available. In this way, the maximum load on the escapement is a dozen marbles (plus a few in the conduit from the reservoir balances to the escapement).
Here is how to build the reservoir: First, build for each balance the following cage:
Next, the actual balance:
Add this wall:

And a wall on the other side, as well as a small coin as a weight:
Now, glue the top cover on page 19 to the top of the machine. Connect the back escapement to the channel that leads from the reservoir to the escapement.
Glue the block of reservoir balances onto the top cover, so that the balance exits align with the channel.
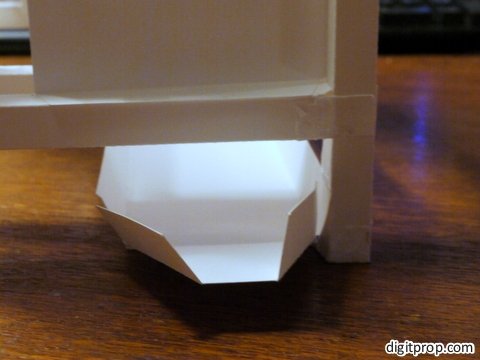
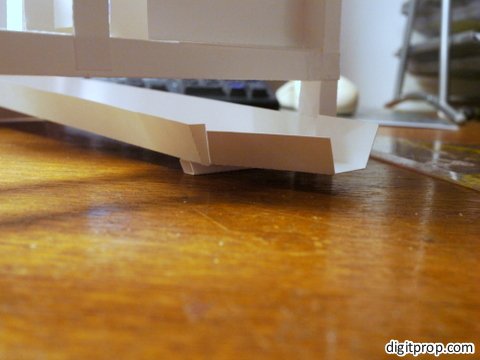
Ok, we need just one final thing: An outlet that collects and funnels the marbles the machine outputs. This is on page 22 of the template. Simply glue it to the right vertical struts of the machine, like so:
Congratulations, you are done! Now it’s time for some testing and finetuning. Check that all moving parts work well with as little friction as possible. Make sure that the marbles can traverse the conduits without blockage. If you come across any problems you cannot debug, please post a comment and I will try to help.