3D printing complex objects without support
With the popular and affordable standard method of 3D printing, FDM (fused deposition modelling, a fancy way of saying that the object is created by squirting a string of liquified plastic layer by layer onto a support), one problem is that overhangs are difficult to print. Anytime something protrudes horizontally from a model, the printer literally needs to print into thin air.
The obvious solution is support: These are elements that are not part of the model, but are printed underneath overhangs so that they are stabilized. The support elements need to be cut off after printing, and often require quite some post processing, to make the finished part still look good.
I recently wanted to print the comet 67P (this model, to be precise). It’s not trivial to print, as the comet does not have any flat surface you could use as the base. I didn’t want to use support, as for this model it would have meant cleaning and filing a large part of the surface. So here is what I did instead:
I digitally cut the model into two halves, so that I would have two flat surfaces. I printed the first half. Then I printed a negative ‘mold’ for the first half, which was essentially a cube from which I had subtracted the comet shape with a boolean operation in Blender. I then put the first half upside down (with the flat surface at the top) into the mold, positioned the nozzle of my printer at exactly the right height on the z axis, and printed the second half right on top of the first half.
This is the negative “mold”:
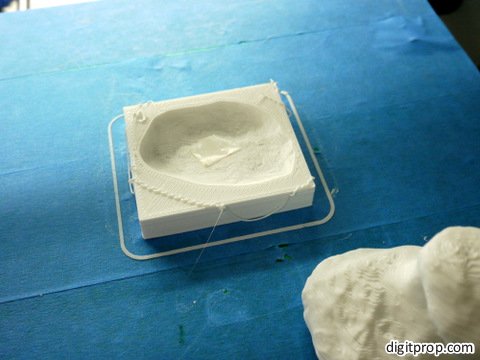
This photo was taken after printing the complete object. The squiggly string draped across the mold is the brim for the second part, which obviously was printed partially into thin air (should have turned brim printing off). If you look closely, you can see that I put a short strip of double-sided sticky tape into the mold, to keep the first part fixed.
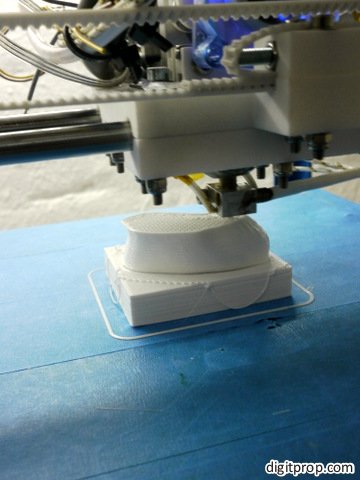
This is right in the middle of printing the seond half onto the first one:
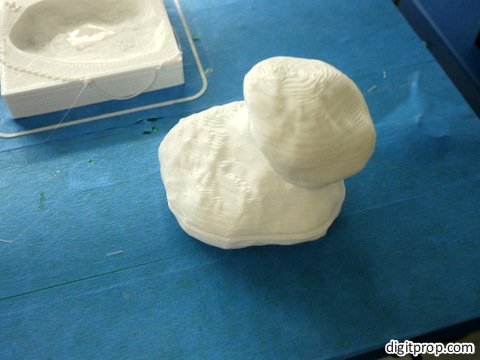
And this is the printed comet:
The difficulty is to get the second print aligned with the first one. There is no software support for this as of now (would be a nice addition to Slic3r or Repetier Host). So what you have to do is align the second half and the mold perfectly on the x and y axis, slice them, print the first half, then the mold, keep it stuck exactly where it is on the support, and then print the second half.
For the second half, you have to manually move the nozzle on the z axis until it is right above the top level of the mold (too low, and it will crash into the mold, too high, and the second part will fail to print properly, or will at least have the first few layers come out very loose and unsightly). Then home it on the x and y axis,
Now you have to disable homing in the G code. For this, I had to delete the command “G28” (“homing on all axes”). Since Slic3r creates G code with absolute coordinates, we need to tell the printer to assume the current position on the z axis as zero. This is done with the command “G92 Z0”, which sets the current position on the z axis to zero. Here is a nice reference of G code commands.
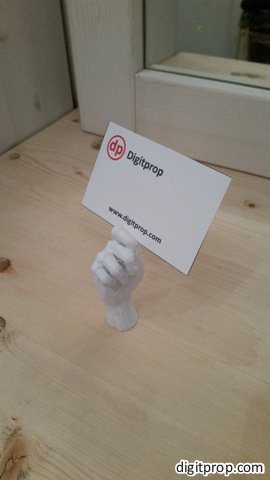
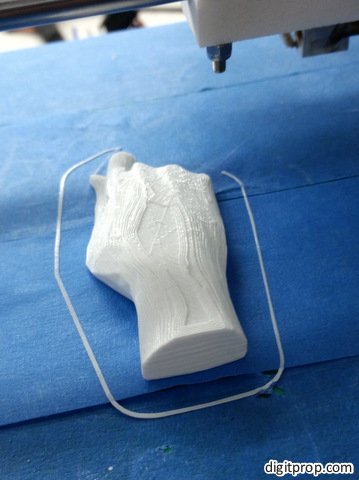
Depending on your model, you may actually not need a whole mold – most often, a number of struts is enough. This is how I printed this business card holding hand:
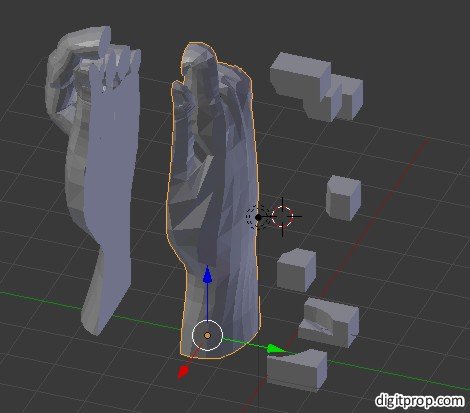
Started by printing one hald (the backside):
Removed it from the support, then printed the struts:
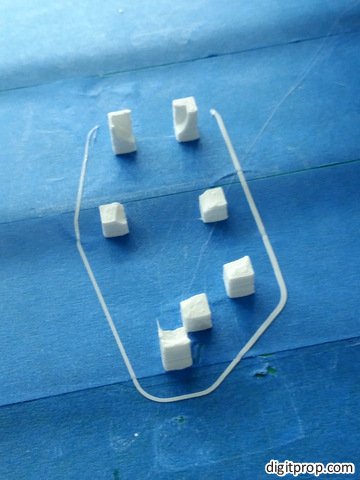
Note that the struts have indentations which perfectly fit the back of the hand:


Then I positioned the nozzle, and started to print the second half (the front):
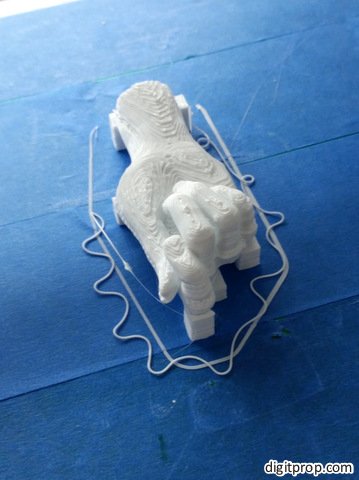
Again, you an see the brim I forgot (once again!) to turn off. It felt strange, simply picking up the finished object instead of carefully detaching it from the support:
The struts are created just like the mold. You create a couple of cubes, then subtract the object from them.
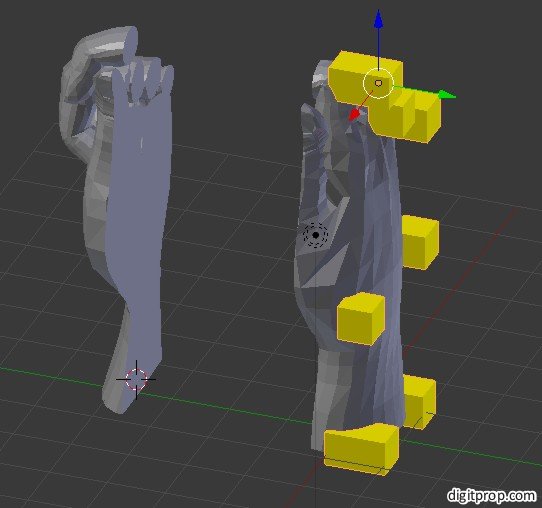
I have first split the hand into two halves, using a large cube and two boolean operations (“Add modifier, Boolean, Difference / Intersect”). Then I have created seven small cubes, and joined them. then subtracted the back half of the hand using once again “Difference”.
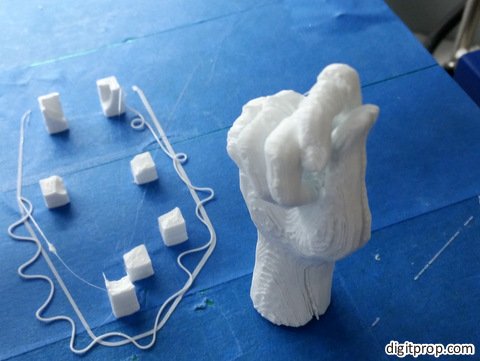
The result is not perfect – you can still see a seam where the second half starts – but depending on how well the nozzle was aligned on the z axis, the seam can be quite small. It’s definitely better than gluing to halves together, and depending on the model looks better than using support.
 This work is licensed under a Creative Commons Attribution-NonCommercial-NoDerivatives 4.0 International License. For more details on what you can and cannot do with my work, see here.
Pingback: #3DPrinting complex objects without support #3DThursday #3DPrinting « adafruit industries blog
Pingback: 3D Printing Without Support | Ad Pub
Hi Brian,
Nice hack! Very creative. Maybe some of the software guys see your post.
Regards, Lance
Hi Markus,
Nice hack! Very creative. Maybe some of the software guys see your post.
Regards, Lance
Pingback: 3D Printing Without Support - Tech key | Techzone | Tech data
Pingback: 3D Printing Without Support | Hackaday